Cross-Stitch Family Portrait Pattern Guide
Make a cross-stitch pattern of your whole family from a photo. Why group portraits are the hardest to convert, how to keep every face recognizable, and the full workflow.
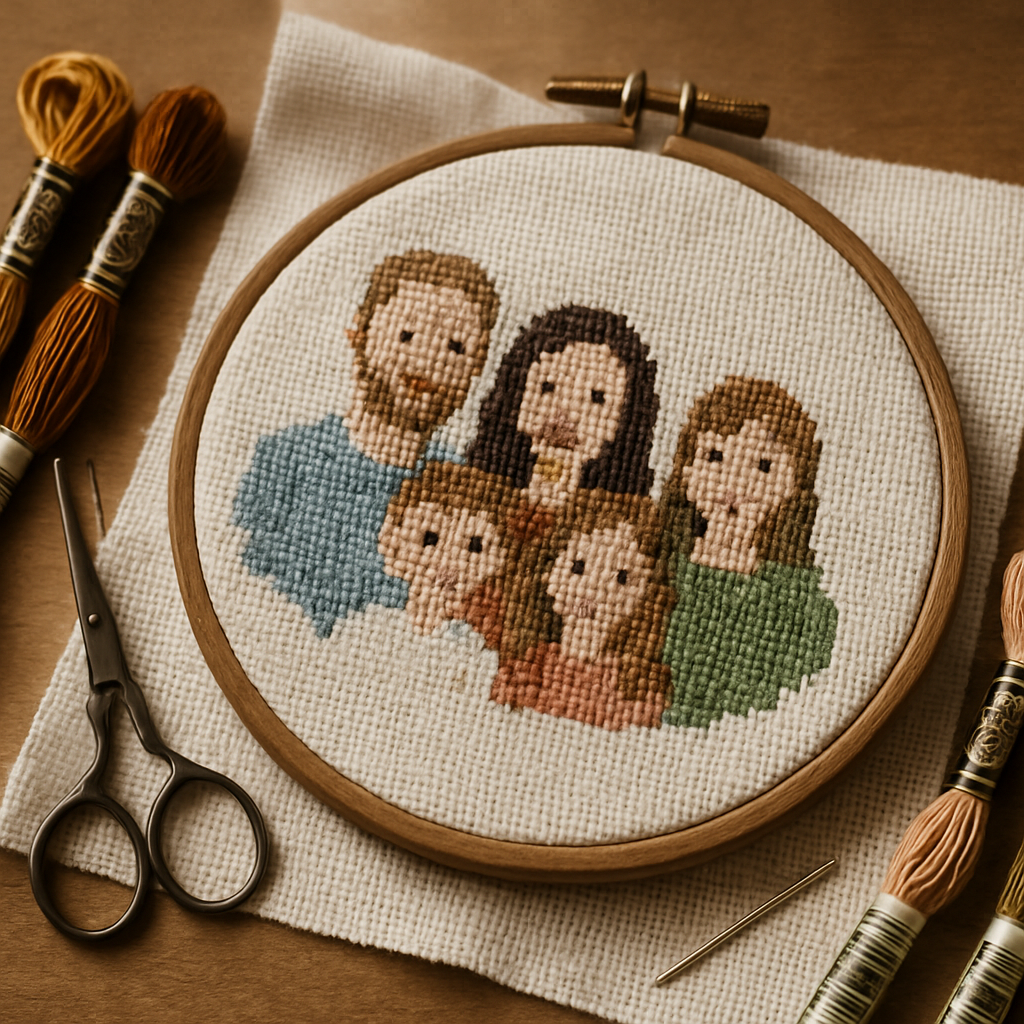
A cross-stitch family portrait is the kind of project people keep for generations — the whole family, rendered in thread, hanging in the hall. It's also the single most demanding photo subject in the craft. A pattern of one face is hard enough; a pattern of five faces, each of which has to be recognizable as that specific person, is the championship round.
The good news is that everything that makes a family portrait hard is understandable and manageable once you know what you're up against. This guide covers why group portraits are uniquely challenging, the one piece of math that determines whether your portrait succeeds or fails, and the full workflow for turning a family photo into a chart where everyone still looks like themselves.
Why family portraits are the hardest portrait
 A single-subject portrait has one job: capture one face. A family portrait has to capture several, simultaneously, and that multiplies every challenge:
- Every face must be recognizable. Aunt June can't come out looking like a generic woman. Each person needs enough detail to read as them.
- Faces compete for resolution. This is the big one (more below). The more people in the frame, the fewer stitches each face gets.
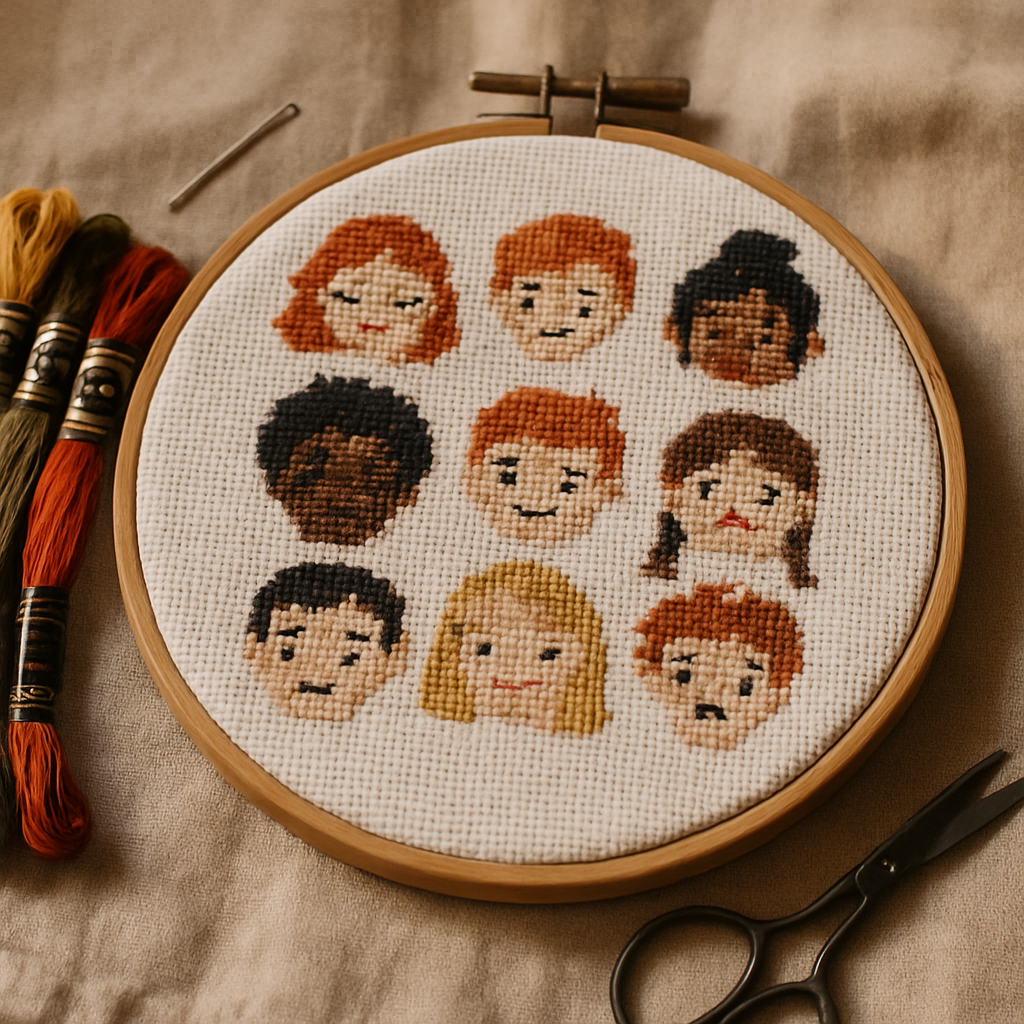
- Skin tones vary. A multi-generational, multi-ethnic family needs a palette that flatters a range of complexions, not one default skin tone.
- Everyone's in a different pose and light. In a group shot, one face is in shadow, another is turned, a third is squinting. The conversion has to handle all of them.
None of this means a family portrait is out of reach. It means you plan for it deliberately — starting with the most important concept in this whole guide.
The one thing that determines success: stitches per face
 Here's the insight that separates a great family portrait from a disappointing one. A pattern has a fixed stitch count — say 200 × 200. A face needs a certain minimum number of stitches across to render recognizable detail (eyes, nose, mouth, the proportions that make a face that face). Call it roughly 60–80 stitches wide for a convincing face.
Now do the arithmetic:
- One person filling a 200-wide grid: that face can be ~150 stitches across. Lavish detail.
- Two people side by side: each face gets ~80–90 stitches. Still great.
- Five people across the same grid: each face is down to ~40 stitches. That's not enough — faces start to blur into "a person" rather than "Grandpa."
The family-portrait rule The more faces you include, the bigger your pattern needs to be to keep each face detailed. A single portrait is comfortable at a modest size; a five-person family wants a higher stitch count and a larger finished piece so every face keeps its resolution. Decide your headcount first — it drives every other decision.
This is why family portraits often want a larger stitch count than the free tier's 200 × 200 maximum. A couple converts beautifully within it; a big group portrait benefits from the higher counts available on paid plans, precisely so nobody's face gets shortchanged. Use the size math in our Aida 14 vs 16 vs 18 guide to translate stitch count into finished inches before you commit.
Choosing the right family photo
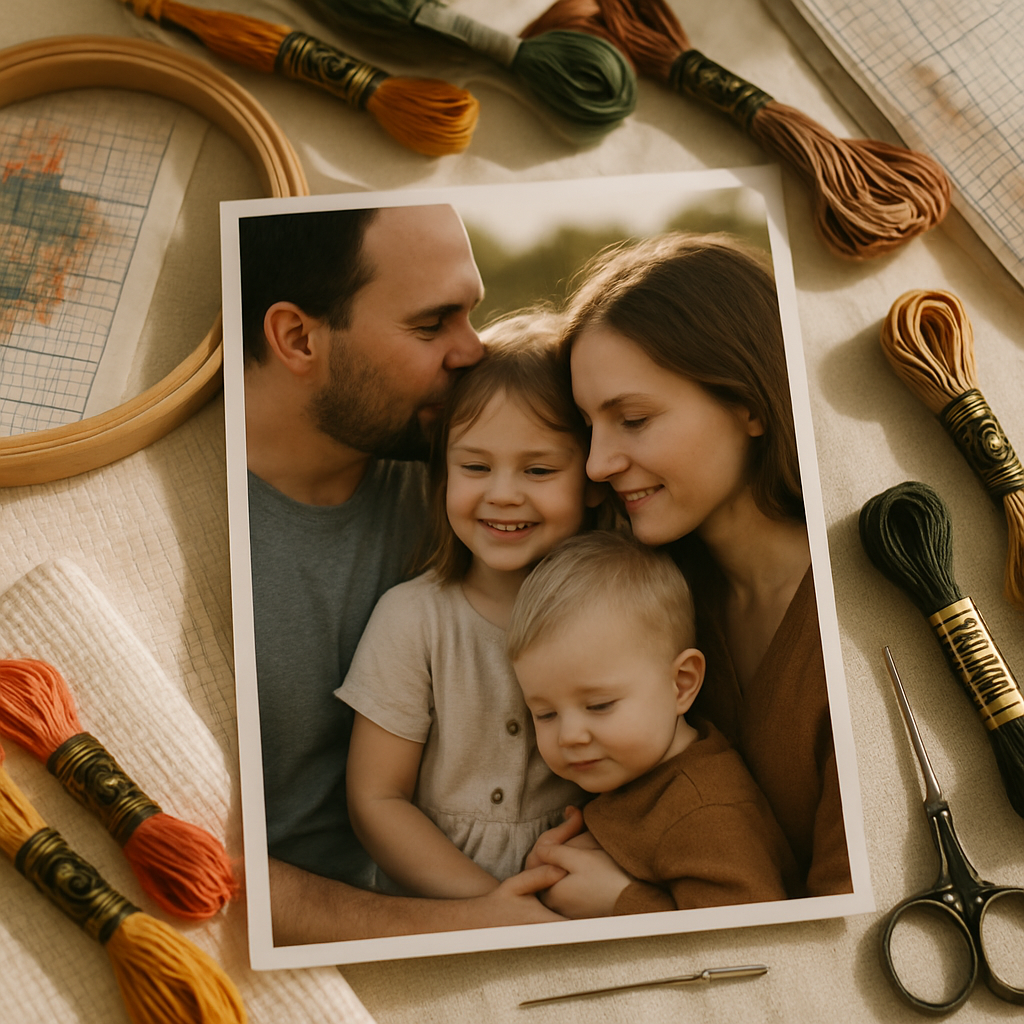 Because resolution is precious, the photo matters even more than usual. Look for:
The family-photo checklist
- Everyone at a similar distance from the camera, so no one face is tiny.
- Even light across all faces — avoid one person in deep shadow.
- Everyone in focus, ideally on the same focal plane.
- Faces unobstructed — no one half-hidden behind another.
- A tight, intentional crop is possible — the family fills the frame, not a distant group across a park.
- High resolution — use the original photo, not a compressed share or screenshot.
The portrait principles in our pet photography guide apply to people too, and the iPhone photo workflow covers shooting and converting from your phone.
But here's the reality of family photos: the perfect one rarely exists. Someone was missing that day. The only good photo of Grandpa is a faded print from 1974. Two great shots exist but not one with everyone in it. This is exactly where StitchThis's Advanced tools earn their keep — they let you build the source image you wish you had, before a single stitch is charted. The whole philosophy: AI perfects the source photo, then your pattern is charted faithfully from it. (More in the next section.)
Advanced tools: building the family photo you wish you had
For family portraits specifically, the Advanced toolkit is the difference between "I don't have a usable photo" and a finished heirloom. Each of these works on your source image — it never touches the stitches, which are always rendered faithfully from the prepared photo:
- Upscale & Enhance — the family-portrait MVP. Most treasured family photos are old: scanned prints, low-resolution snaps, a slightly blurry candid that's the only one you have. Enhance sharpens a soft or low-res photo so the detail actually survives into the chart. If your best photo of a late relative is a grainy 90s print, start here.
- Combine Subjects — pick subjects from two photos and combine them into one scene. This is how you add the family member who wasn't there: photograph or scan them separately, and bring them into the group. (It works two photos at a time, so it's ideal for adding one person or joining two subjects — not compositing a dozen separate headshots.)
- Merge Images — blend or connect two images into one composition. Connect literally stitches two photos together side by side; blend reimagines them as one. Useful for marrying two shots into a single source.
- Remove or Replace Background — strip a distracting background or drop the family onto a clean one, so every stitch of detail goes to the people instead of the clutter behind them.
- Stylize — apply a consistent look (a soft Painterly treatment, for instance) to unify photos taken in different lighting, or to give the whole portrait a cohesive, gentler feel.
The honest framing matters here, especially for a piece you'll hang for decades: these tools improve the photo. The cross-stitch chart is then charted faithfully from that improved photo — there's no AI inventing how the stitches look. You're giving the conversion the best possible raw material, not faking the result. (The Advanced tools are part of the Maker plan; the core conversion, viewer, and tracker are free.)
The workflow, step by step
Here's how to turn a family photo into a faithful chart with StitchThis:
1. Set your size to your headcount. Before anything, decide how many faces and therefore how big the pattern needs to be. More people → higher stitch count so each face keeps detail.
2. Upload your photo from phone or computer — browser-based, nothing to install.
3. Crop tight to the family. Every wasted inch of background is resolution stolen from the faces. Crop so the people fill the frame. For group shots, a careful crop usually matters more than background removal — though simplifying a chaotic background still helps the chart spend its detail on faces.
4. Let StitchSense protect every face. This is the multi-subject heart of the project. StitchSense keeps detail sharp on the focal subjects — all the faces, not just the center one — while calming the busier, less important areas. That's what keeps each person recognizable instead of dissolving the group into a soft blur. The pattern is charted faithfully from your photo — every stitch maps directly to the source image, not invented.
5. Choose a complexity that suits portraits. A Detailed quality level usually serves faces best, holding fine features while keeping the chart workable. (The tool flags that Full Color can introduce confetti — worth noting, but faces generally reward more detail than fur does.)
6. Build a skin-tone-aware palette. Set colors from multi-brand floss — DMC, Anchor, Cosmo, Gamma, Madeira, or Metro — and make sure you've got a generous range of skin tones, because a family portrait often spans several complexions and ages. Getting these near-tones right is what makes faces look alive rather than flat. Our forthcoming palette guide goes deep on skin tones; the DMC vs Anchor guide helps with brand matching.
7. Generate, refine, and stitch. You get a real chart with a full symbol legend and a clean PDF, in a built-in viewer with a stitch tracker. If a background area near someone's shoulder went speckly, the viewer's editing tools (fill, replace a color, paint individual stitches) let you clean it up without re-generating — useful on a large, precious piece you don't want to redo.
Start your family portrait free You can convert a family photo into a stitchable pattern on StitchThis free That's ideal for a couple or a small group; for a larger family you'll want the higher stitch counts on a paid plan so every face stays detailed. Either way, StitchSense protects all the faces at once. Try StitchThis free →
Family portraits, family trees, and heirlooms
A family portrait pairs naturally with a family tree pattern — one captures faces, the other captures lineage, and together they make a powerful heirloom set. Both are favorite gifts for milestone anniversaries, reunions, and big birthdays.
When a portrait includes someone who has passed, treat the project with the care it deserves. A two-photo merge can lovingly bring a missing family member into a group portrait from a separate photo. Our memorial pattern guide speaks to that gentler kind of stitching. And if you find people asking to commission family portraits from you, our forthcoming guide on selling portrait commissions covers turning the skill into income.
Frequently asked questions
Can I make a cross-stitch pattern of my whole family from one photo? Yes. Upload a good group photo, crop tight to the family, and convert it. The key is using a large enough pattern that each face keeps enough stitches to stay recognizable — the more people, the bigger the pattern should be.
How big does a family portrait pattern need to be? It depends on headcount. A convincing face needs roughly 60–80 stitches across, so a couple is comfortable around 200 stitches wide, while a five-person portrait wants noticeably more so each face keeps its detail. Decide how many faces first, then size accordingly.
Why do the faces in my family pattern look blurry or generic? Almost always not enough stitches per face — too many people crammed into too small a grid. Increase the stitch count (a larger finished piece), crop tighter to the family, and use detail-preserving conversion so every face stays sharp.
How do I handle different skin tones in one portrait? Build a palette with a generous range of skin tones rather than relying on a single default. Multi-brand floss palettes let you assemble flattering tones across complexions and ages. A good conversion will use subtle near-tones to give each face dimension.
Can I combine two photos into one family portrait? Yes — the Combine Subjects and Merge Images tools work on two photos at a time, which is ideal for adding a family member photographed separately or joining two shots into one scene. (They handle two images per operation, so they're for adding a person or marrying two pictures, not compositing many separate headshots.). For large groups, a single well-composed group photo is still the best base. These are Maker-plan tools.
My only photo of a relative is old and blurry — can I still use it? Often, yes. The Upscale & Enhance tool sharpens a low-resolution or soft photo so more detail survives into the chart — genuinely useful for scanned prints and old family snapshots. It improves the source photo; the pattern is then charted faithfully from the result.
Is the family portrait AI-generated? No. The chart is rendered faithfully from your photo — every stitch maps to the source image. Optional advanced tools help you clean up the source before charting; the stitches themselves are not invented.
What fabric count should I use for a family portrait? A finer count (16 or 18) fits more detail per inch, which helps when several faces share the design — though it makes the finished piece smaller and the stitching more demanding. Balance detail against the size you want on the wall; see Aida 14 vs 16 vs 18.
Everyone, in thread
A family portrait is the most ambitious portrait you can stitch, and the most rewarding when it works. The secret isn't a trick — it's respecting the math. Decide how many faces you're including, size the pattern so each one keeps its detail, choose a photo where everyone is lit and in focus, and let the conversion protect every face rather than just the center of the frame.
You can start free. Make your family portrait on StitchThis — upload a photo, keep every face sharp with StitchSense, build a skin-tone-aware palette, and stitch from the built-in tracker. The whole workflow lives in StitchThis — build the pattern, manage your floss stash, view and track and edit the chart in the browser, and stitch alongside a community of other cross-stitchers. no AI in the stitching — just your family, charted faithfully. Try StitchThis free →
Ready to turn your photo into a cross-stitch pattern?
Try StitchThis freeTwo patterns per month. No card required.