Cross-Stitch Family Tree Patterns: How to Design a Custom One
Design a custom cross-stitch family tree pattern that fits your family, not a template — layout ideas, lettering tips, and how to add every name and date yourself.
A family tree is one of the few cross-stitch projects that becomes more valuable with every passing year. It's not just decoration — it's a record. Which is exactly why the generic family-tree charts you find online tend to disappoint: they're built for a family that doesn't exist. Four neat branches, two kids, names that all happen to be short. Real families are messier, bigger, more interesting — and far more meaningful when the pattern actually fits them.
This guide is about designing a family tree pattern that's genuinely yours: the right structure for your family's shape, lettering that holds every name and date legibly, and a layout with room for the branches still to grow. We'll cover the design decisions first, then walk through how to build one from scratch without needing to be an artist.
Why most family tree templates let you down
 Pre-made family tree charts share a few predictable problems:
- Fixed slots. Three children when you have five. No space for a late-arriving grandchild. A spouse with nowhere to go.
- Short-name bias. The template's lettering looks tidy because it was designed around "Tom" and "Sue." Drop in "Aleksandra" or "Christopher" and the name spills off its branch.
- One generation too few. You want grandparents and great-grandparents; the template stops at two tiers.
- Someone else's style. Their color palette, their font, their idea of a tree. Lovely, but not your family.
A family tree is inherently personal data. The pattern that holds it should be built around your names, your generations, and your aesthetic — which means designing it yourself is usually the only way to get it right. The good news: that's far more approachable than it sounds.
Decide your family tree's structure first
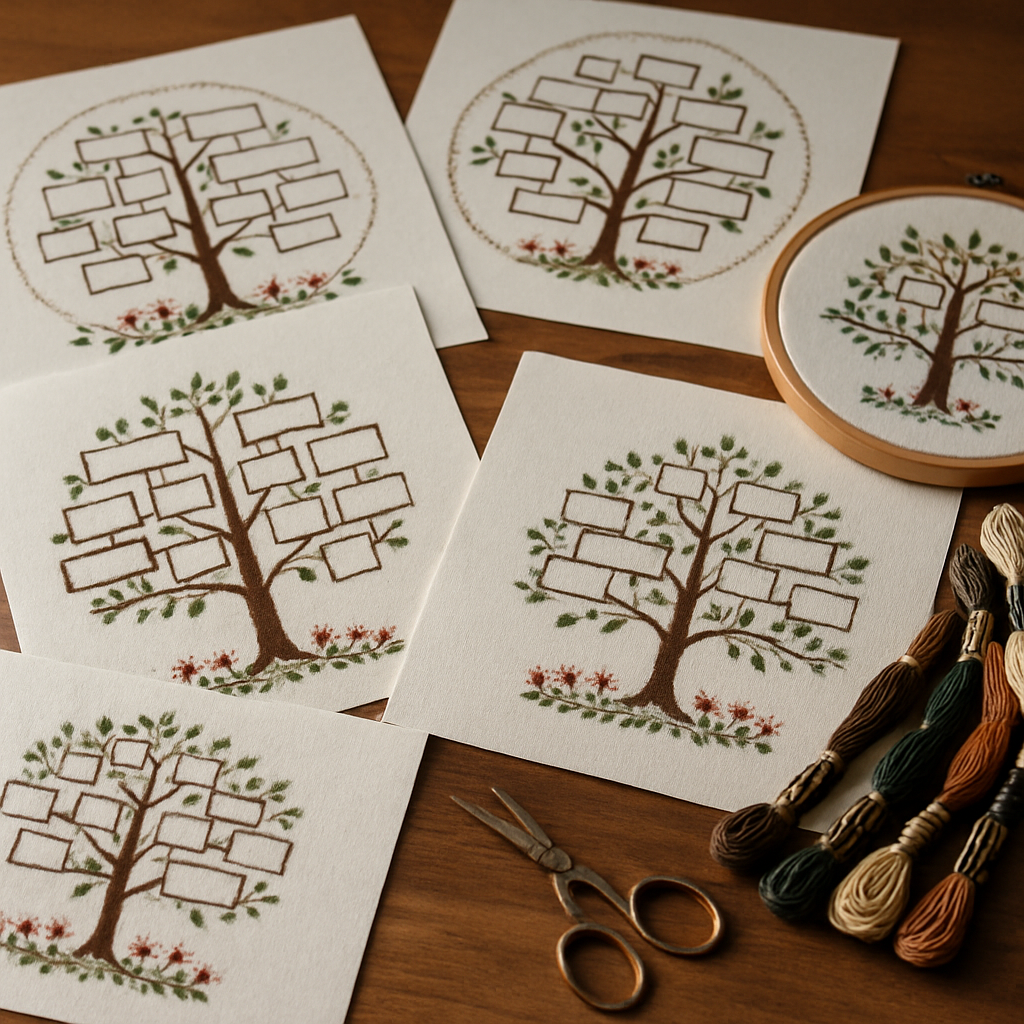
 Before any stitching or charting, settle the shape of the thing. Four structures cover almost every family tree pattern:
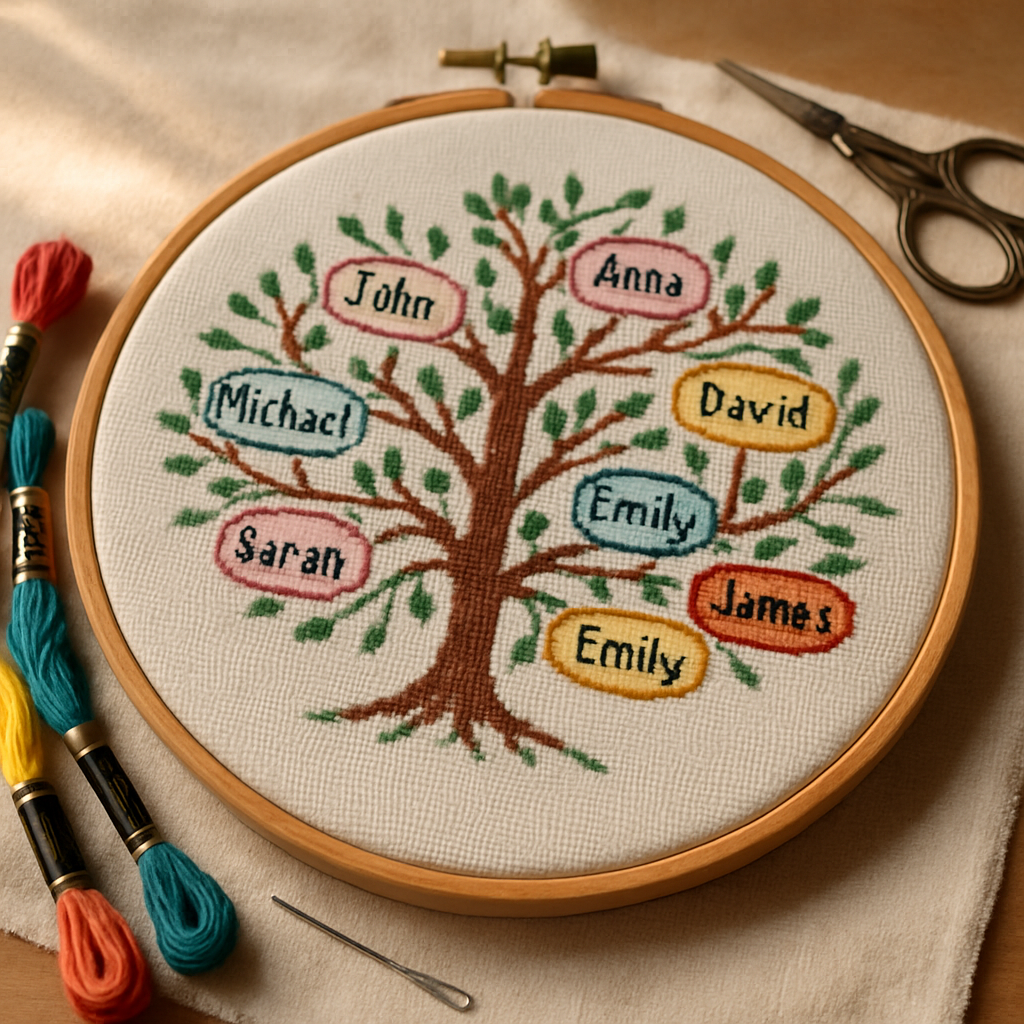
1. The literal tree. A trunk and spreading branches, names stitched as "leaves" or hanging tags. Warm and traditional; best when you have a manageable number of names and want a decorative, pictorial feel.
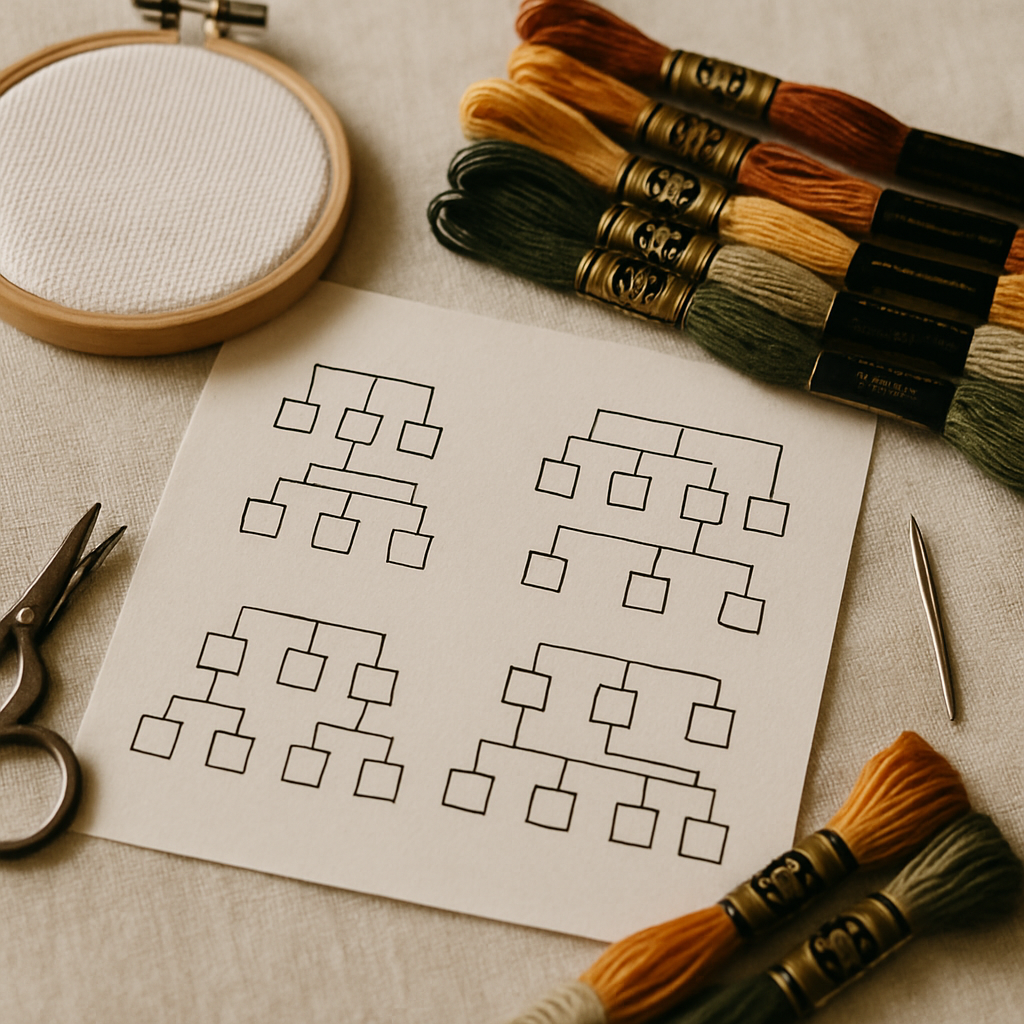
2. The branching diagram. A clean genealogy chart — boxes or lines connecting generations top to bottom. Best for larger families or when accuracy and readability matter more than ornamentation.
3. The heart or wreath arrangement. Names radiating around a central motif. Lovely for a couple's descendants or a tighter family group. (Decorative frame shapes like wreaths and hearts are their own topic — here we're using the arrangement, not making the shape the subject.)
4. The sampler style. Names and dates laid out as bands of text with small motifs between them, in the tradition of antique family record samplers. Elegant, text-forward, and infinitely expandable.
Plan for growth The single most common family-tree regret: no room left for the next baby. Before you finalize the layout, decide whether this is a snapshot (this family, this year) or a living record you'll add to. If it's living, build in empty branches or blank bands now — adding space later means re-working the whole piece.
The hard part is the lettering
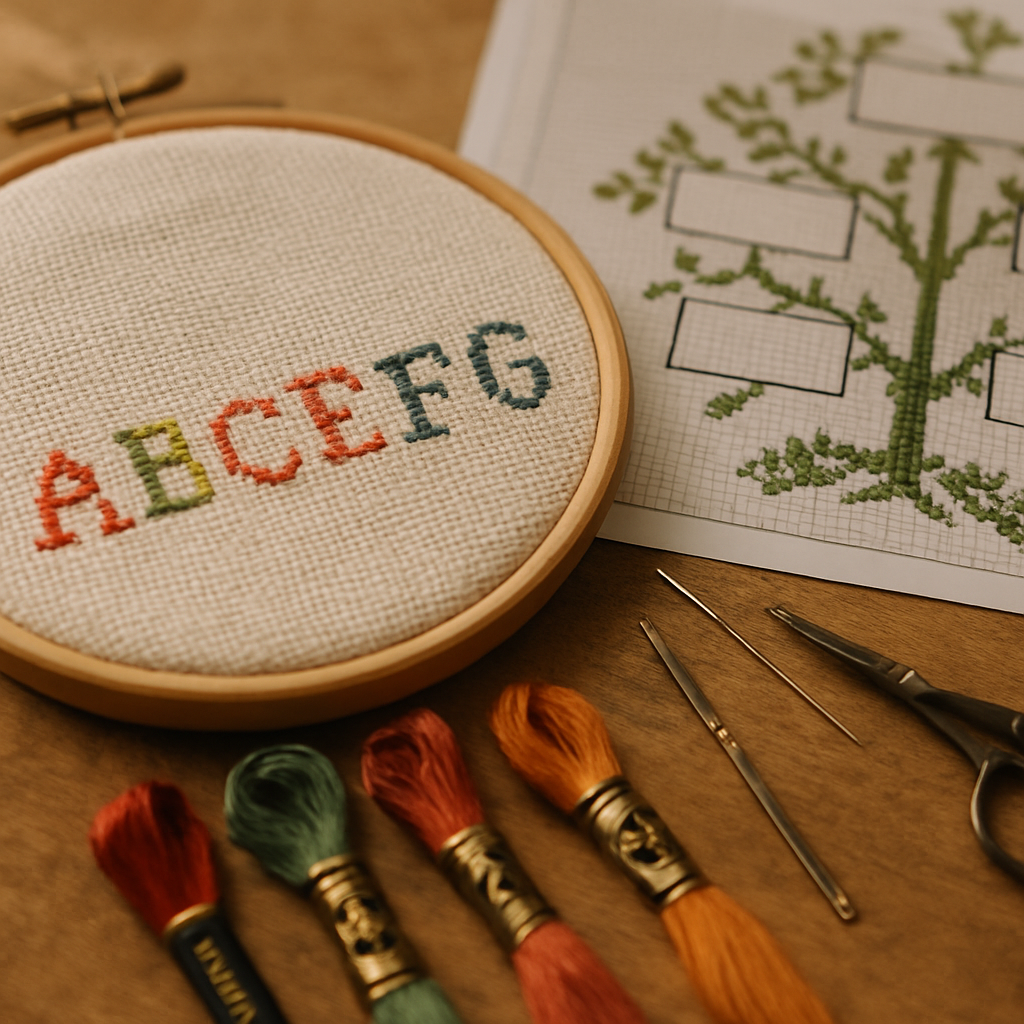 Here's the truth no template admits: the difficulty of a family tree pattern isn't the tree. It's the text. Names and dates have to be legible at small stitch sizes, fit consistently along branches of different lengths, and stay readable in whatever fabric count you choose.
A few principles that save heartache:
- Design around your longest name and date, not your shortest. If "Bartholomew" fits, everyone fits.
- Pick a font built for small sizes. Highly decorative scripts look beautiful at 60 stitches tall and become unreadable mush at 12. Cleaner letterforms read better the smaller they get.
- Keep dates consistent. Decide on a format (1962–2024, or "b. 1962") and use it everywhere. Mixed formats look accidental.
- Mind contrast. Dark thread on light fabric for text, always. Pale names on pale backgrounds vanish.
- Leave breathing room. Cramped lettering reads as cramped. A stitch or two of space around each name does a lot.
For the mechanics of charting and reading lettering — how letters map to stitches, how the legend handles text colors — our symbols and notation guide and beginner's guide to reading a pattern are useful companions.
How to design your own family tree pattern (step by step)
You don't need to draw freehand on graph paper or wrestle with desktop charting software. A browser-based freehand designer lets you build the whole thing visually and exports a real, stitchable chart with the legend and symbols set up for you. Here's the workflow using StitchThis:
1. Set your canvas and shape. Choose your dimensions and a shape (rectangle for a classic framed piece, or a round/oval arrangement for a wreath-style tree). Your fabric count determines how many stitches fit, so decide that early — our Aida 14 vs 16 vs 18 guide helps you balance detail against finished size. A name-heavy tree benefits from a finer count so the lettering stays crisp.
2. Draw the structure. Use the brush and shape tools to lay down your trunk, branches, hearts, or sampler bands. Flood-fill regions with color. Because the freehand canvas isn't grid-locked, your branches and curves come out smooth, then quantize cleanly into stitches at preview time. You're drawing the design directly, and it's charted faithfully into stitches — nothing invented.
3. Add every name and date with the text tool. This is where a custom tree is won or lost. Drop in a text box, type a name, and place it exactly where it belongs — resize it to fit its branch, rotate it to follow a curve, and color it to match your palette. StitchThis includes a library of fonts (a selection on the free tier, the full set on Maker), so you can pick letterforms that stay legible at stitch scale. Add dates the same way. (For a deeper dive into lettering on any pattern, our forthcoming guide on adding a name covers the fine points.)
4. Choose your palette. Set your colors from multi-brand floss palettes — DMC, Anchor, Cosmo, Gamma, Madeira, or Metro — so the legend matches the thread you already own or prefer. A common, effective trick: color-code by generation (one hue per tier) so the family structure reads at a glance.
5. Refine and export. Tidy any stray stitches, check the lettering reads cleanly, and export a clean PDF chart with the full symbol legend. The pattern opens in a built-in viewer with a stitch tracker, so when you start stitching you can tap each completed stitch and never lose your place across what is often a long project.
Build your family tree free You can design a custom family tree pattern on StitchThis at no cost That's plenty for a focused tree; very large multi-generation records may want a bigger canvas on a paid plan. Either way, the names, fonts, layout, and palette are entirely yours. Try StitchThis free →
Want a portrait at the center?
Some of the most striking family trees place a photo at the heart of the design — a couple whose descendants branch out around them, or a family home. You can convert a photo into a pattern and build your tree around it. The pattern is charted faithfully from your prepared photo — every stitch maps to the source image. Our walkthroughs on making patterns from your photos and the forthcoming family-portrait guide cover that side in depth.
Family tree patterns as heirlooms and gifts
A custom family tree is one of the most-requested heirloom gifts in cross-stitch — for milestone anniversaries, family reunions, a grandparent's significant birthday, or simply to preserve a lineage before the details are forgotten. Because it's so personal, the fit matters enormously: the right names, spelled right, with the right dates, in a layout that honors how your family actually looks. A generic template can't do that. A pattern you design can.
If your tree is meant to commemorate someone who's passed, treat the project with the care it deserves — our memorial pattern guide speaks to that gentler kind of stitching, and the same thoughtfulness applies to a remembrance branch on a family tree.
Frequently asked questions
Can I make a cross-stitch family tree pattern myself? Yes, and for an accurate one you almost have to. A browser-based freehand designer lets you draw the tree, add every name and date with a text tool, choose your palette, and export a stitchable chart — no drawing-on-graph-paper required. StitchThis does this and lets you start free.
How do I add names and dates to a family tree pattern? Use a text tool that places editable text boxes you can resize, rotate, and color, then charts the lettering into stitches. Design around your longest name, pick a font that stays legible at small sizes, and keep your date format consistent throughout.
What fabric count is best for a family tree with lots of names? A finer count (16 or 18) keeps lettering crisp because each stitch is smaller and more detail fits per inch — though it makes the finished piece smaller and the stitching more demanding. For a name-heavy tree, the extra legibility is usually worth it. See Aida 14 vs 16 vs 18.
How do I leave room to add future family members? Decide up front whether the piece is a snapshot or a living record. For a living record, build in empty branches or blank sampler bands now. Adding space after the layout is finalized usually means redesigning the whole piece.
Should I color-code the generations? It's a popular and effective choice — one floss hue per generation makes the family structure readable at a glance. Multi-brand palettes let you pick colors that coordinate and that you already own. Our forthcoming color-palette guide covers building a cohesive scheme.
Can I include a photo in the family tree? Yes — place a converted photo at the center and branch the names around it. The photo is charted faithfully into stitches — every stitch maps to the source image, not invented.
Your family, your tree
The best family tree pattern isn't the prettiest template you can find — it's the one that holds your actual family: every name spelled correctly, every date in place, every generation represented, with space for the ones still to come. That's not something you download. It's something you build.
And building it is more approachable than it's ever been. You can design a custom family tree on StitchThis free — draw the structure, add every name with the text tool, pick your floss brand and palette, and export a clean, charted PDF with a built-in stitch tracker for the long, rewarding stitch ahead. From pattern creation through floss tracking to in-browser viewing and editing — plus a community of stitchers around it — StitchThis is the whole pipeline in one place. Try StitchThis free →
The full StitchThis workflow
Whatever you're making — a beginner piece, a memorial portrait, a gift, a pattern to sell — the StitchThis pipeline is the same handful of pieces working together, and each one is built around a friction that kills other tools.
- Photo-to-pattern conversion with StitchSense keeps the detail where the eye lands (faces, eyes, focal subjects) and simplifies what's behind it, so the finished piece looks like the subject rather than a confetti smear.
- Six floss brands in the legend — DMC, Anchor, Cosmo, Gamma, Madeira, Metro — so the pattern arrives in the brand you actually own.
- Floss stash tracker with CSV upload (from an existing spreadsheet) or photo upload (snap your skein organiser to import in seconds, no manual data entry).
- In-browser viewer that doubles as a chart editor — tap each stitch to track progress, paint or fill new stitches with the draw tools, change all instances of one colour to another, edit fractional stitches and backstitch.
- Freehand designer for drawing patterns from scratch or adding names, dates, and personal touches to a generated chart.
- Studio-tier FORGE batch generation for designers producing multiple variations from one source.
- Clean PDF export ready to print, share, or sell.
- The whole workflow in one place — pattern creation, floss tracking, the in-browser viewer with chart editor, and a community of stitchers cheering each other on.
Try StitchThis free — the workflow is built around the small frictions that kill other tools, so you can spend the time stitching instead of fighting your software.
Related reading on StitchThis:
Ready to turn your photo into a cross-stitch pattern?
Try StitchThis freeTwo patterns per month. No card required.