StitchThis
VyšíváníKřížková výšivkaKomunitaCeník
Přihlásit seZaregistrovat se zdarma
  1. Home
  2. ›Embroidery
  3. ›Transferring a pattern

Hand embroidery guide

How to Transfer an Embroidery Pattern to Fabric (Every Method Compared)

You have a pattern you love on paper, but the fabric is dark, or stretchy, or a shirt you can’t put on a window, and you’re worried the lines won’t wash out.

Here is every common transfer method side by side: what each one is best for, what you need and where it goes wrong, so you can pick the right one for your fabric before you mark anything.

Make my embroidery patternRead the guide
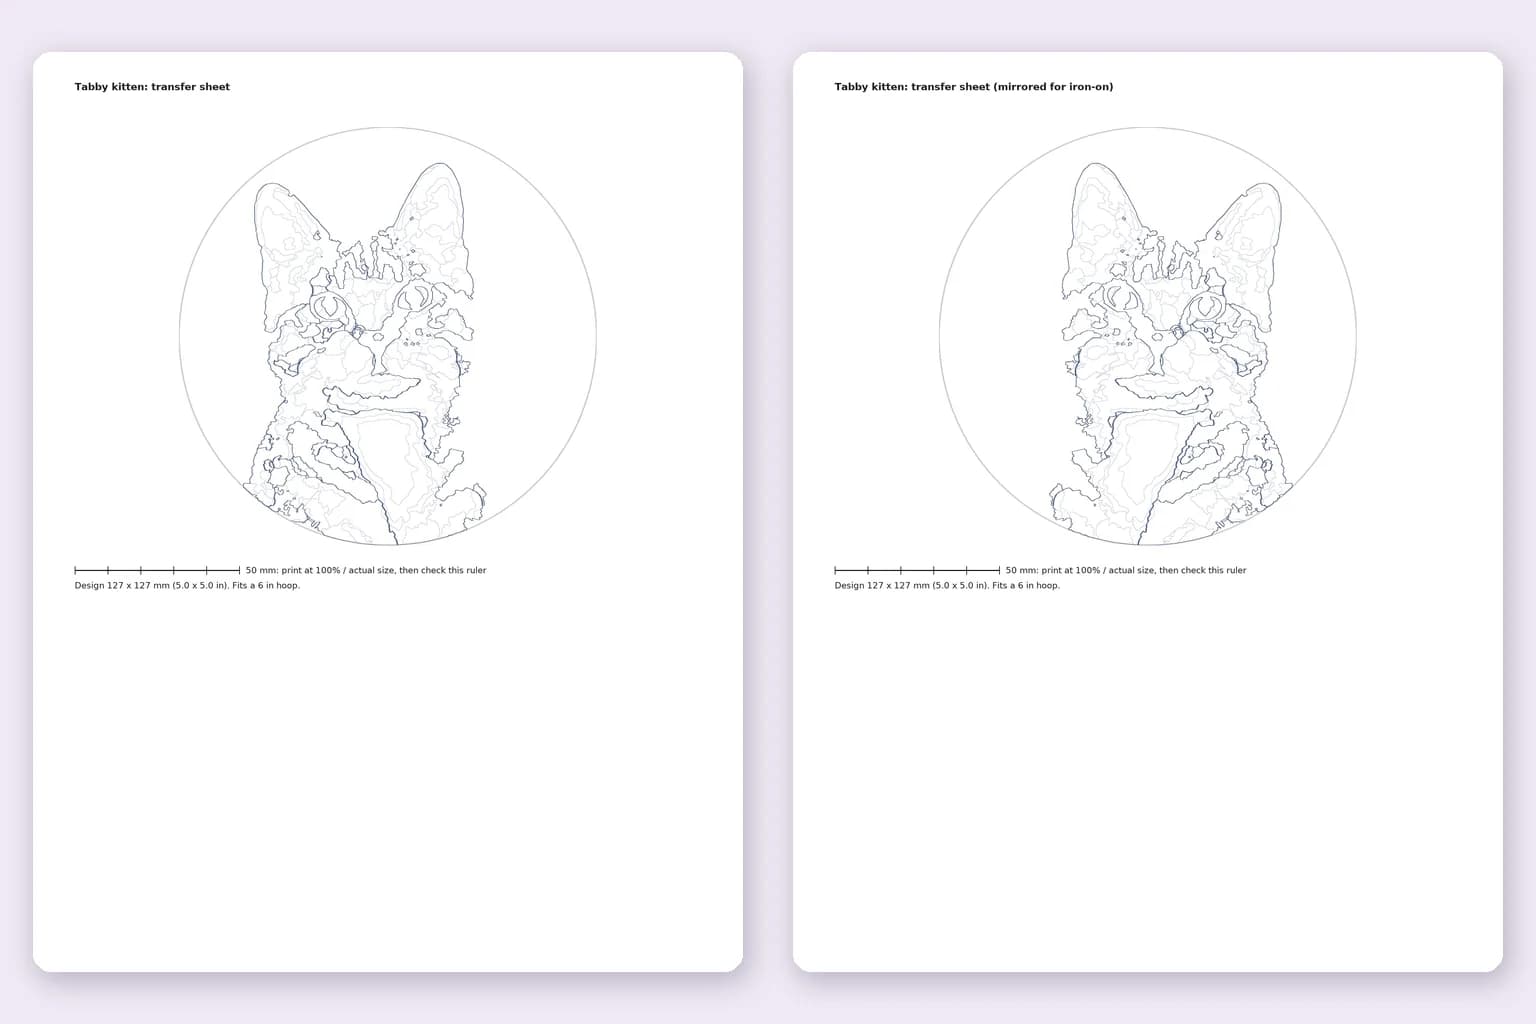
The full-size transfer sheet and the mirrored iron-on transfer sheet from a StitchThis embroidery pattern, each with a 50 mm ruler

Embroidery transfer methods at a glance

There is no single best way to get a design onto fabric. The right method depends on how light or dark the fabric is, whether you can see through it, and whether the marks need to disappear afterward. Start with the table, then read the notes on each method below.

Ways to transfer a hand embroidery pattern
MethodBest forYou needWatch out for
Tracing (light box or window)Light, thin fabrics: cotton, linen, quilting cottonA light source, tape, a fabric marking penDoesn’t work on dark or thick fabric; tape both layers so nothing shifts
Water-soluble penLight fabrics you can rinseA water-soluble marking penMarks can fade with humidity before you finish; ironing can set them
Heat-erasable penLight fabrics you’d rather not wetA heat-erasable pen, an ironMarks can reappear in the cold; test on scrap first
Iron-on transfer pen or pencilRepeating a design; fabrics you can’t see throughA transfer pen or pencil, a mirrored copy of the design, an ironLines are usually permanent, so stitching must cover them
Carbon / dressmaker’s paperMedium and dark fabrics (with light-colored paper)Transfer paper, a stylus or dry ballpointLines can smudge as you stitch; press firmly but evenly
Water-soluble stabilizer (stick-and-stitch)Dark, stretchy or textured fabric, and clothingPrintable or traceable stabilizer sheetsRinse thoroughly afterward; some fabrics and threads shouldn’t be soaked
Printable fabricLight designs where printed lines will be coveredPrinter fabric sheets, an inkjet printerPrinted lines may not wash out; size of the sheet limits the design

Whatever you choose, test the marker and the method on a scrap of the same fabric first.

How each method works

  • Tracing on a light box or window

    Tape the pattern to a light box or a sunny window, tape the fabric over it with the grain straight, and trace with a water-soluble or heat-erasable pen. It is the cheapest method and the easiest to control.

  • Iron-on transfer pen or pencil

    Trace a mirrored copy of the design onto plain paper with the transfer pen, then iron it face-down onto the fabric. Because the ink flips as it transfers, the design comes out the right way round. See how to use an iron-on transfer.

  • Carbon or dressmaker’s paper

    Lay the transfer paper ink-side down on the fabric, the pattern on top, and trace over the lines with a stylus or an empty ballpoint. Use white or yellow paper on dark fabric.

  • Stick-and-stitch stabilizer

    Print or trace the pattern onto water-soluble stabilizer, peel and stick it to the fabric, stitch straight through it, then soak it away. Nothing ever touches the fabric directly.

  • Printable fabric

    Print the design onto fabric sheets made for printers and stitch over the printed lines. Handy for quick projects, but plan for the lines to stay.

See your own photo as a hand embroidery pattern: stitches, directions, threads and a printable transfer.

Try the pattern maker

Dark fabric, denim and clothing

Light won’t shine through dark or heavy fabric, so tracing is out. Water-soluble stabilizer is usually the easiest answer: the lines sit on top in black ink and rinse away when you’re done. Light-colored carbon paper or a white fabric marker also works on dark cotton.

For T-shirts, sweatshirts and other knits, stabilizer does two jobs: it carries the design and it stops the fabric stretching while you stitch. Hoop the garment loosely enough not to distort the knit, and keep stitches compact so they don’t pull when the shirt is worn.

For a jacket, a tote or a denim pocket you can’t hoop easily, a stick-and-stitch sheet lets you place the design exactly where you want it before you commit a single stitch.

Tips for clean, accurate lines

  • Press the fabric first. Creases distort the design.
  • Line up the design with the fabric’s grain so straight lines stay straight.
  • Leave plenty of fabric around the design: at least 2 inches on every side so it fits the hoop.
  • Trace with a light hand. You only need a line your stitches will cover.
  • Mark only what you need: outlines and shape edges, not every shading change.
  • Don’t iron over water-soluble or heat-erasable marks until you mean to remove them.

Or skip the drawing: get a transfer from your photo

Most transfer trouble starts before the fabric: you need a clean line drawing in the first place. StitchThis turns a photo or drawing into a hand embroidery pattern and prints a full-size transfer sheet with it, plus a mirrored sheet for iron-on transfer pens, so you can trace, iron or print onto stabilizer straight away.

Make a hand embroidery pattern from your photo, then follow how to use the iron-on transfer sheet. If you’d rather design every line yourself, see how to make your own embroidery pattern.

Frequently asked questions

What is the easiest way to transfer an embroidery pattern?

For light, thin fabric, tracing over a window or light box with a water-soluble pen is the easiest and cheapest. For dark fabric or clothing, water-soluble stick-and-stitch stabilizer is usually simpler.

How do I transfer an embroidery pattern onto dark fabric?

Use water-soluble stabilizer, light-colored carbon paper, or a white fabric marker. Tracing won’t work because light can’t shine through dark fabric.

Do water-soluble pen marks come out?

Usually, with cold water once the stitching is done. Heat from an iron can set some of them, so rinse before you press and test the pen on a scrap first.

Are heat-erasable pen marks permanent?

They vanish with heat, but they can reappear in the cold, for example after a winter shipment. Test on scrap and consider rinsing if the brand allows.

Why does an iron-on transfer need a mirrored image?

The design flips as you iron it face-down onto the fabric. Starting from a mirror image makes it come out the right way round, which matters for lettering. StitchThis patterns include a mirrored transfer sheet.

Can I embroider on a T-shirt?

Yes. Use a stabilizer behind or on top of the knit so it doesn’t stretch while you stitch; a water-soluble stick-and-stitch sheet carries the design at the same time.

Keep going

  • How to Use an Iron-On Embroidery Transfer, Step by StepYour StitchThis pattern PDF has two full-size transfer sheets: a normal one for tracing and a mirrored one for…
  • Turn Any Photo Into a Hand Embroidery PatternUpload a picture and get a real hand embroidery pattern: every shape has a stitch and a direction, every color is a…
  • How to Make Your Own Embroidery Pattern, Step by StepHere is how to design a hand embroidery pattern yourself, step by step: drawing it, choosing stitches and colors,…

All embroidery guides and tools

Turn your photo into a hand embroidery pattern

Making and editing a pattern is free with a StitchThis account. Saving it or downloading the PDF uses a pattern credit ($5.99 per pattern, or 5 for $20). Embroidery is included in Maker ($5.99/month) and in Craft Unlimited, with unlimited patterns.

Make my embroidery patternCreate a free account
StitchThis

Kompletní digitální pracovní prostor pro tvůrce křížkových výšivek.

Vyšívání

  • Předloha na vyšívání z fotky
  • Vyšívací stehy
  • Přenesení předlohy na látku
  • Převodník bavlnek
  • Všechny návody na vyšívání

Háčkování

  • Garment Pattern Maker
  • Sweater Pattern Generator
  • Beanie Calculator
  • Yarn Calculator
  • Photo to Crochet Pattern
  • Chart Maker
  • Graphgan Pattern Maker
  • C2C Pattern Maker
  • Symbol Chart Maker
  • Amigurumi Pattern Generator
  • Photo to Amigurumi
  • Stitch Fiddle Alternative

Produkt

  • Tvorba předloh
  • StitchSense
  • Obchod s předlohami
  • Komunita
  • Ceník

Společnost

  • O nás
  • Kontakt
  • Nápověda
  • Podpora

Právní informace

  • Podmínky služby
  • Zásady ochrany osobních údajů

© 2026 StitchThis. Všechna práva vyhrazena.

Vyrobeno s láskou pro vyšívačky a vyšívače všude na světě.