Is the embroidery pattern generator free?
It is free to make and edit a pattern and preview it in stitches. Saving the pattern or downloading the PDF uses a pattern credit or a plan that includes embroidery.
Embroidery pattern generator · free to design
You search “photo to embroidery pattern” and get a cross-stitch grid of tiny squares, or a machine file for an embroidery machine you don’t own. You wanted something you could actually stitch by hand.
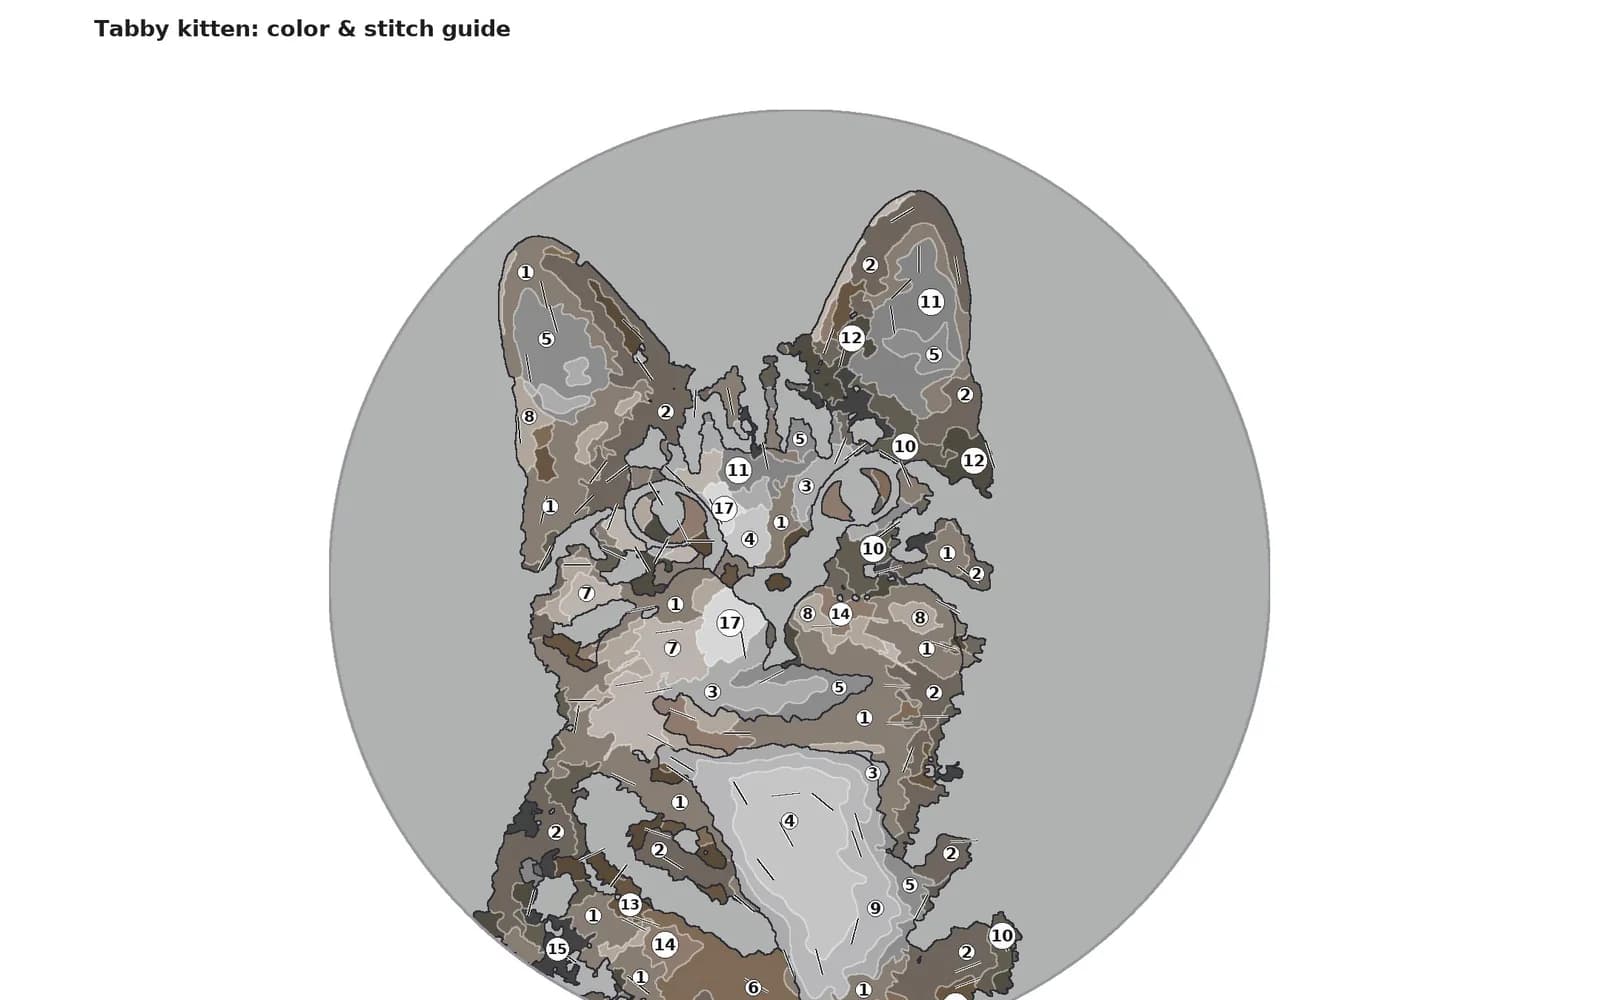
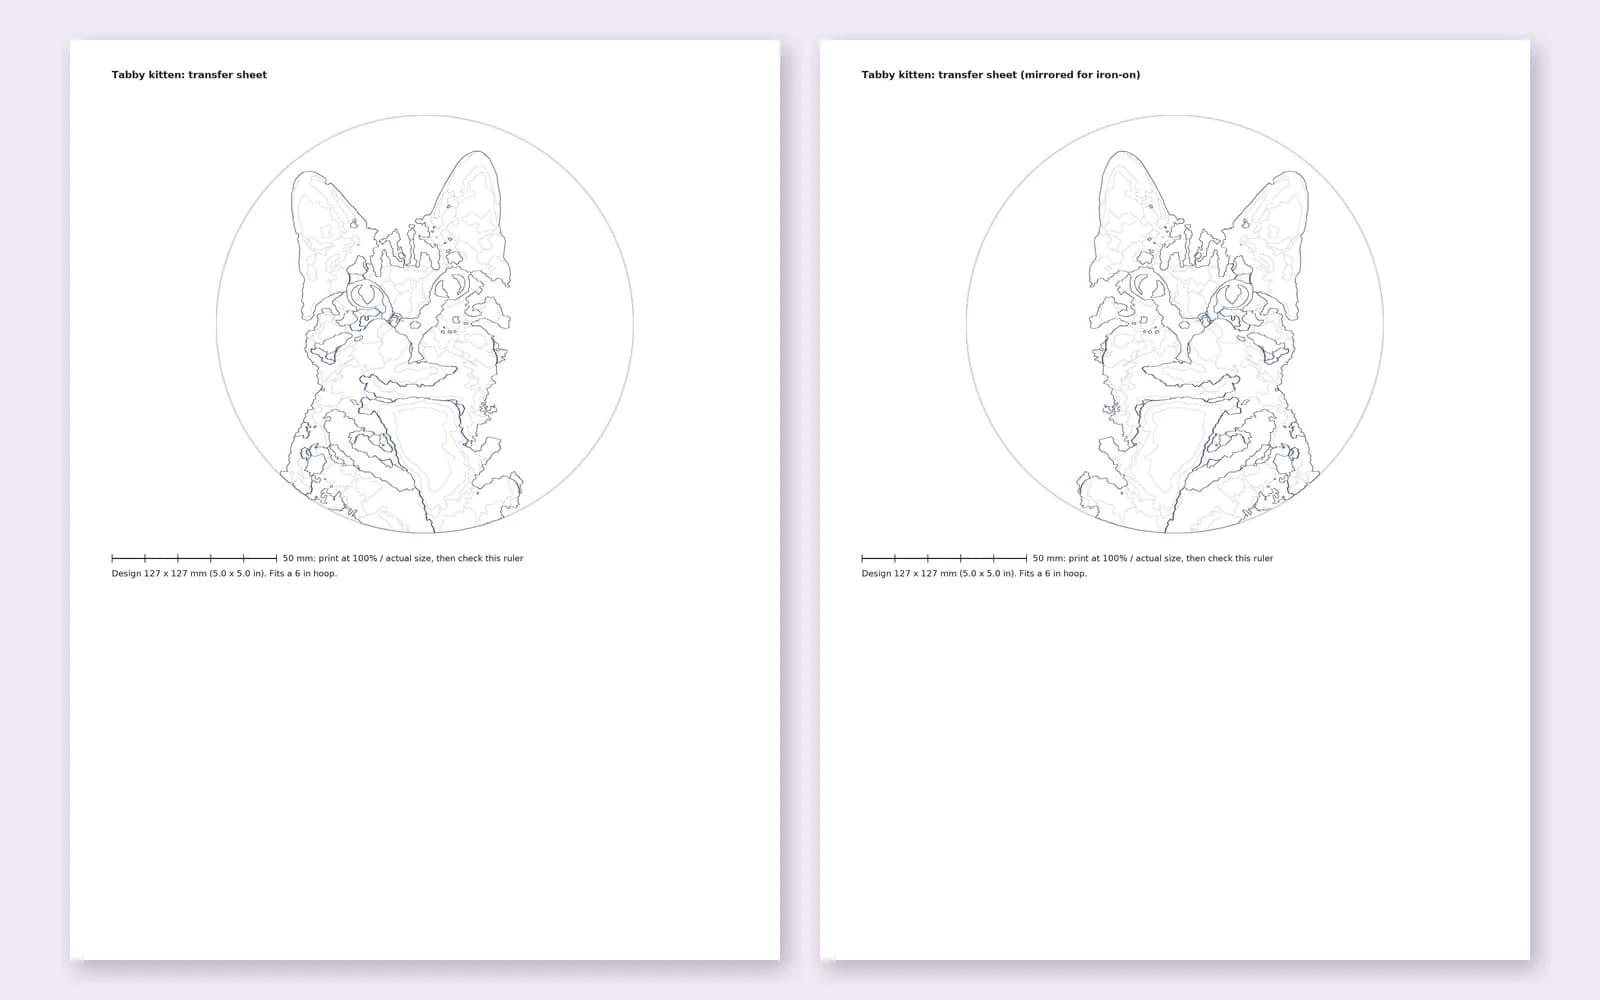
Upload a picture and get a real hand embroidery pattern: every shape has a stitch and a direction, every color is a real thread, and the PDF includes the stitching order, how to do each stitch and a full-size transfer.
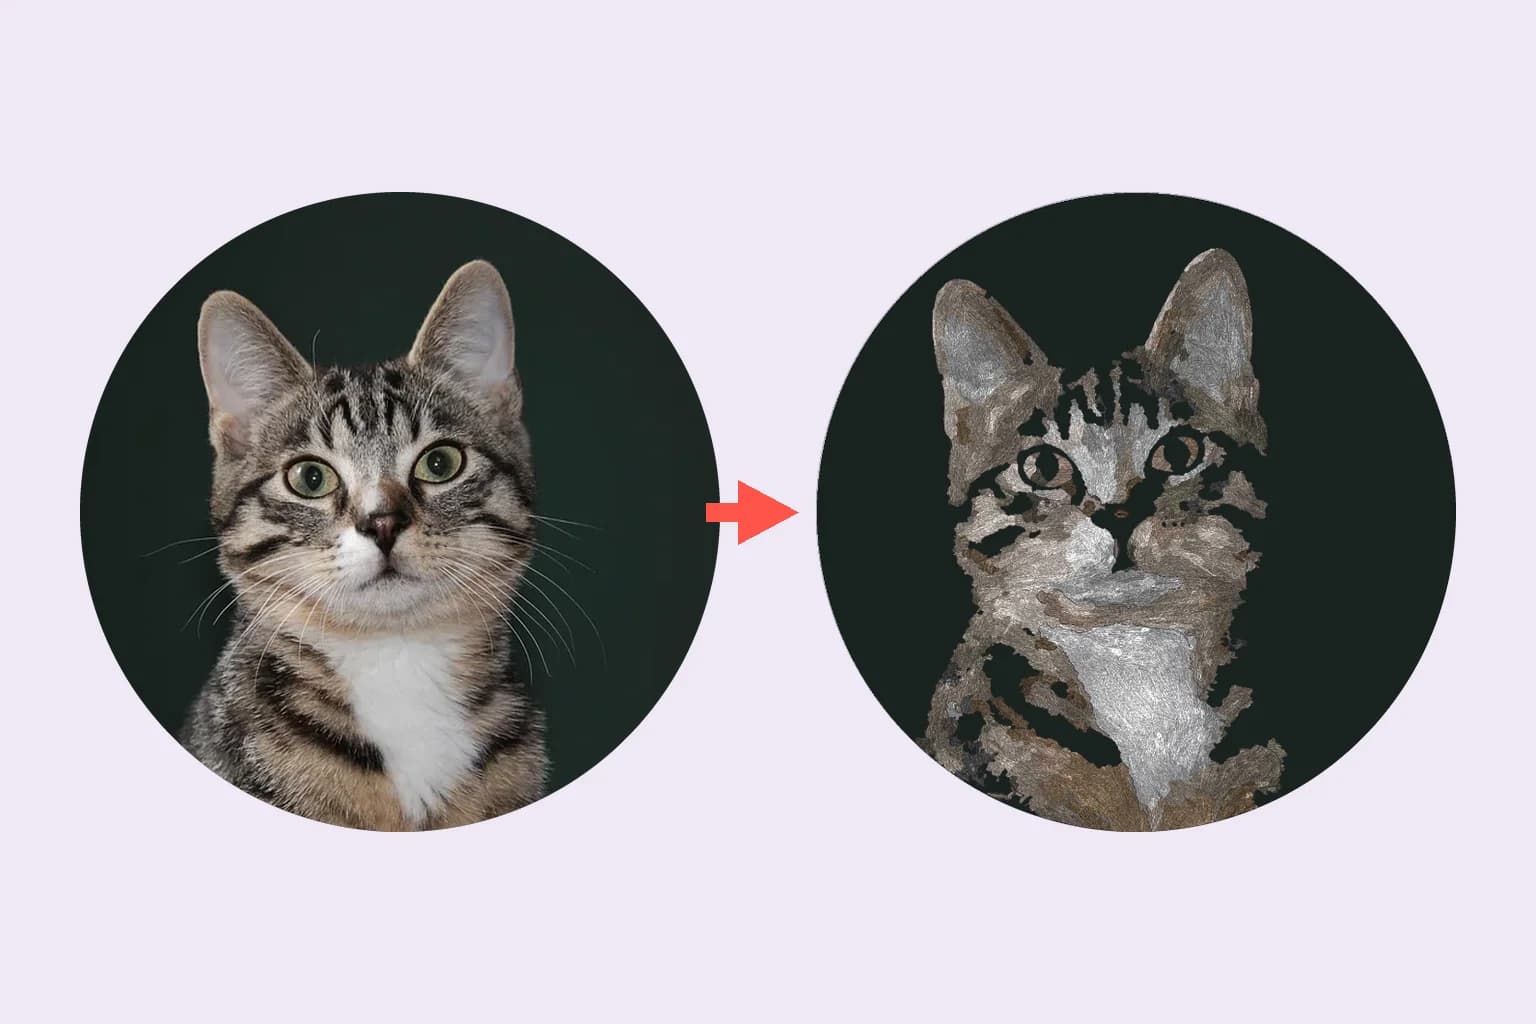
Upload a JPG, PNG, WEBP or HEIC, choose a frame and size, and edit the result shape by shape. Here is what you will see along the way.
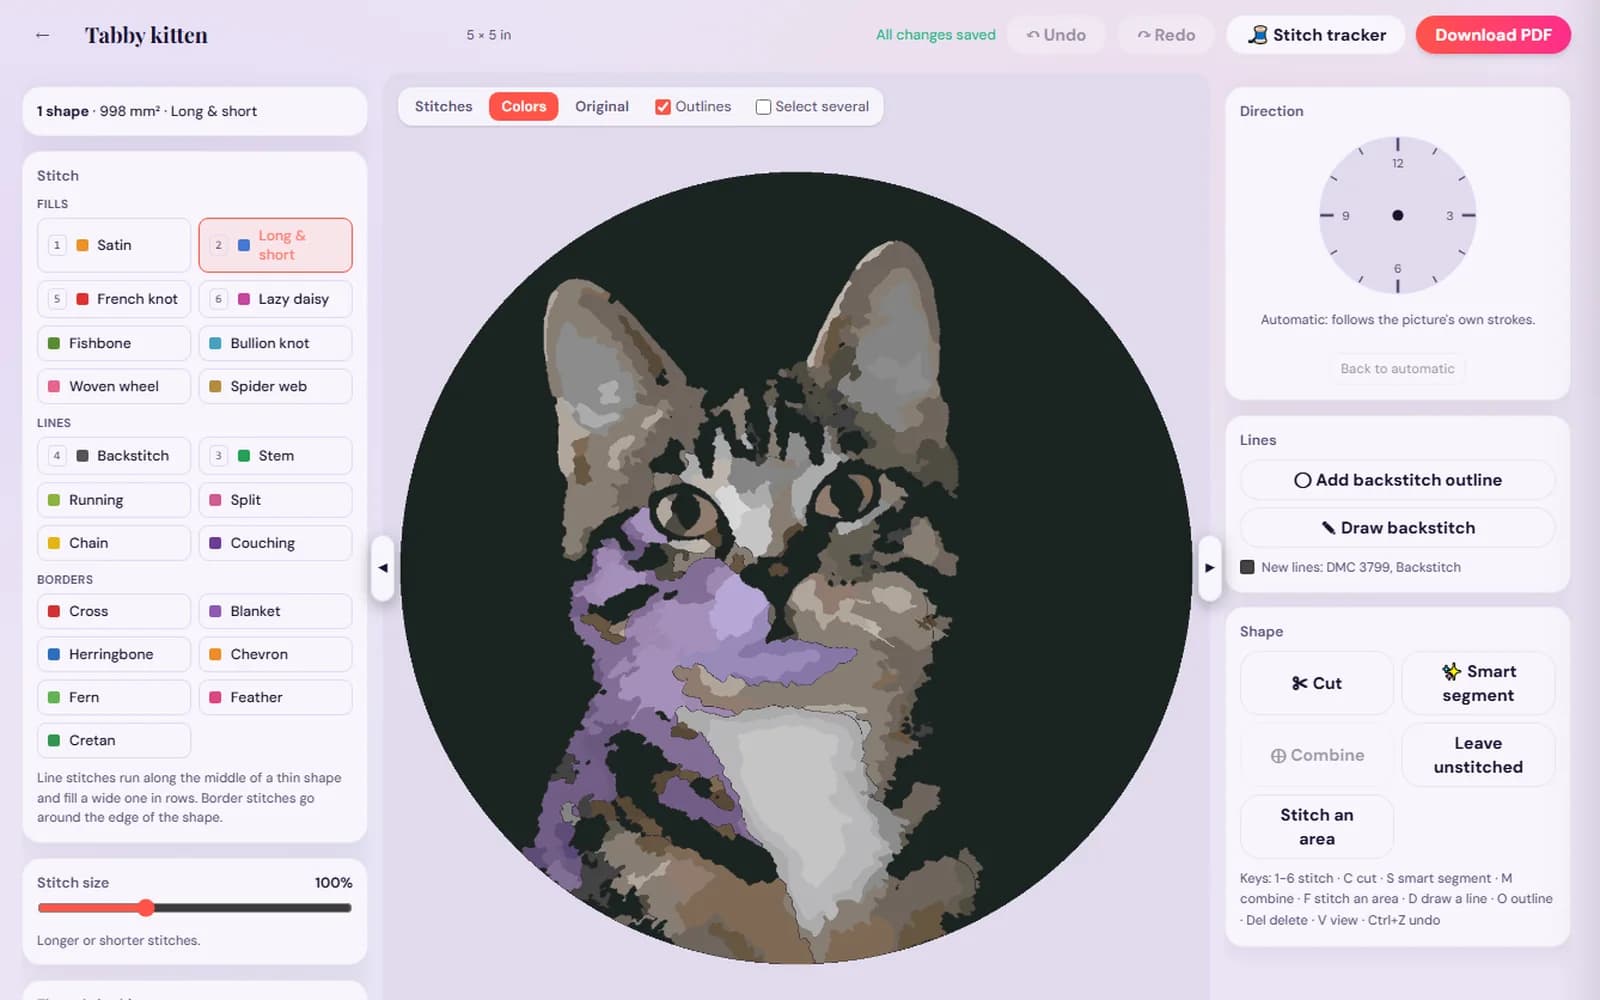
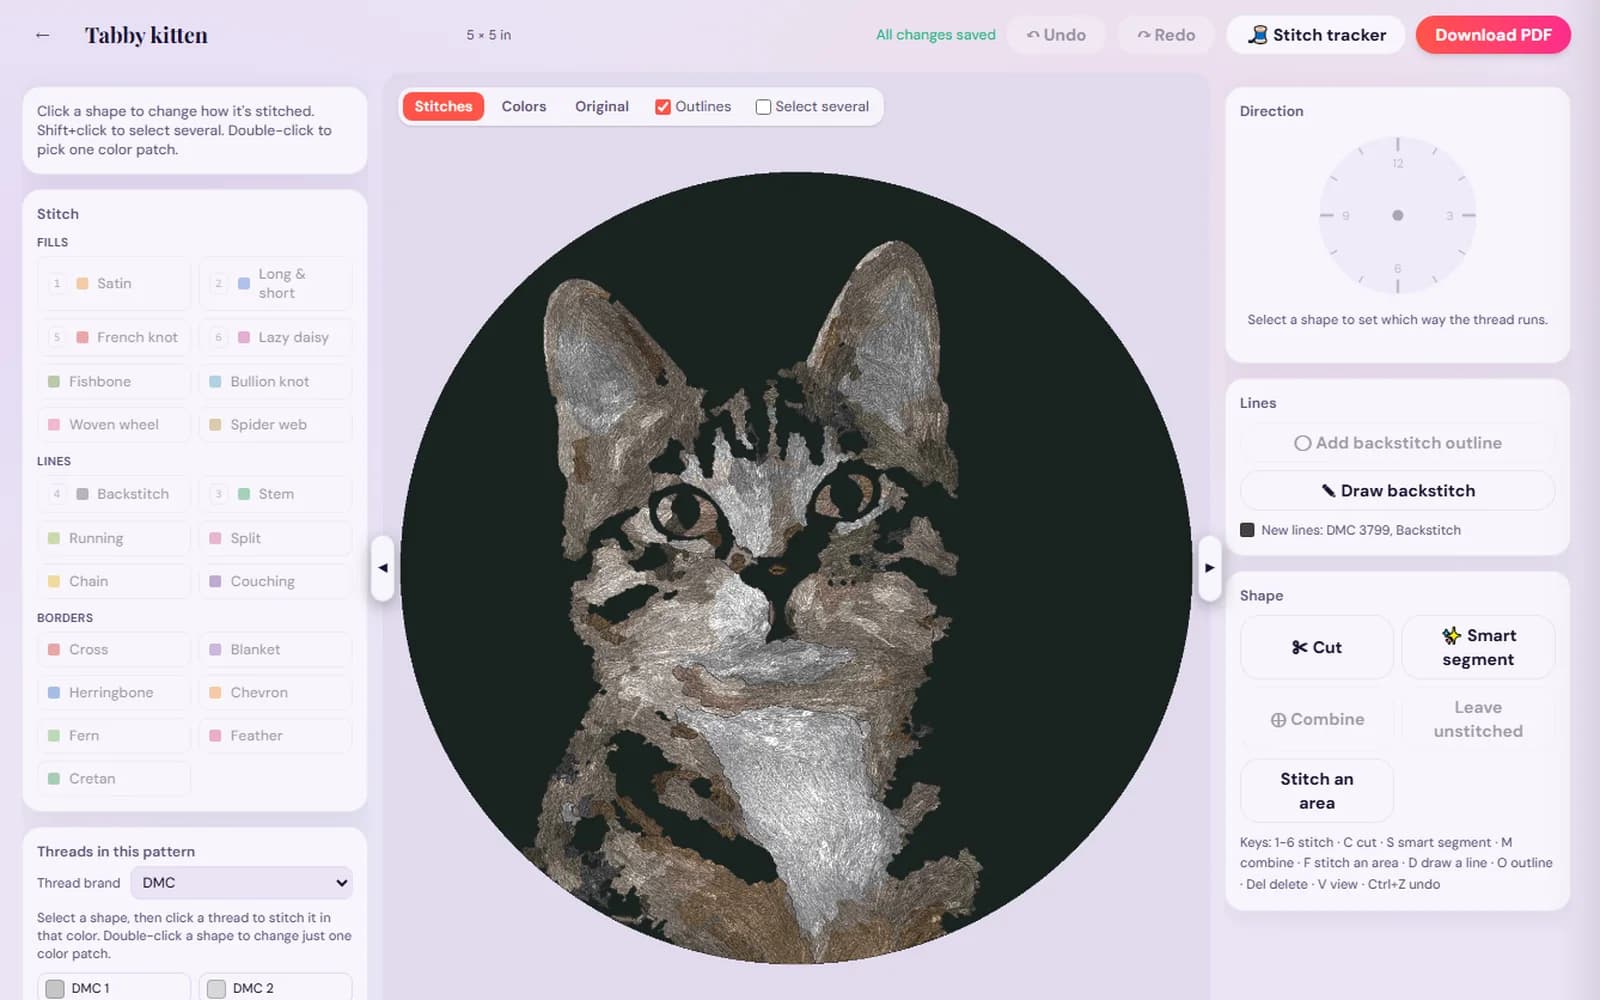
Making and editing a pattern is free with a StitchThis account. Saving it or downloading the PDF uses a pattern credit ($5.99 per pattern, or 5 for $20). Embroidery is included in Maker ($5.99/month) and in Craft Unlimited, with unlimited patterns.
Most tools that promise to turn a picture into an embroidery pattern make one of two things. Cross-stitch converters lay a grid of squares over your photo, one X per square. Digitizing software makes DST or PES files that only an embroidery machine can read. Neither helps if you want to sit down with a hoop, a needle and a few skeins of floss.
This embroidery pattern generator makes free-style hand embroidery: shapes filled with satin and long and short stitch, stems in stem stitch, petals in lazy daisy, centers in French knots, each fill with a direction to lay your stitches in, and a transfer you print and put on fabric. It is the pattern a designer would draw for you, made from your own photo.
Add a photo or a drawing and choose a circle, square or rectangle frame, from 2 to 7 inches. Seven inches keeps the transfer on one printed page at full size.
The generator finds the background, simplifies the colors to real threads (DMC unless you pick another brand), splits the picture into stitchable shapes and picks a stitch and direction for each one. It takes under a minute.
Change a shape’s stitch, turn its direction, recolor it, split or merge shapes, add outlines or draw your own backstitch lines. Undo and redo are always there.
Save the pattern and download the PDF. Print the transfer sheet at 100%, or use the mirrored sheet with an iron-on transfer pen. The transfer guide covers every method.
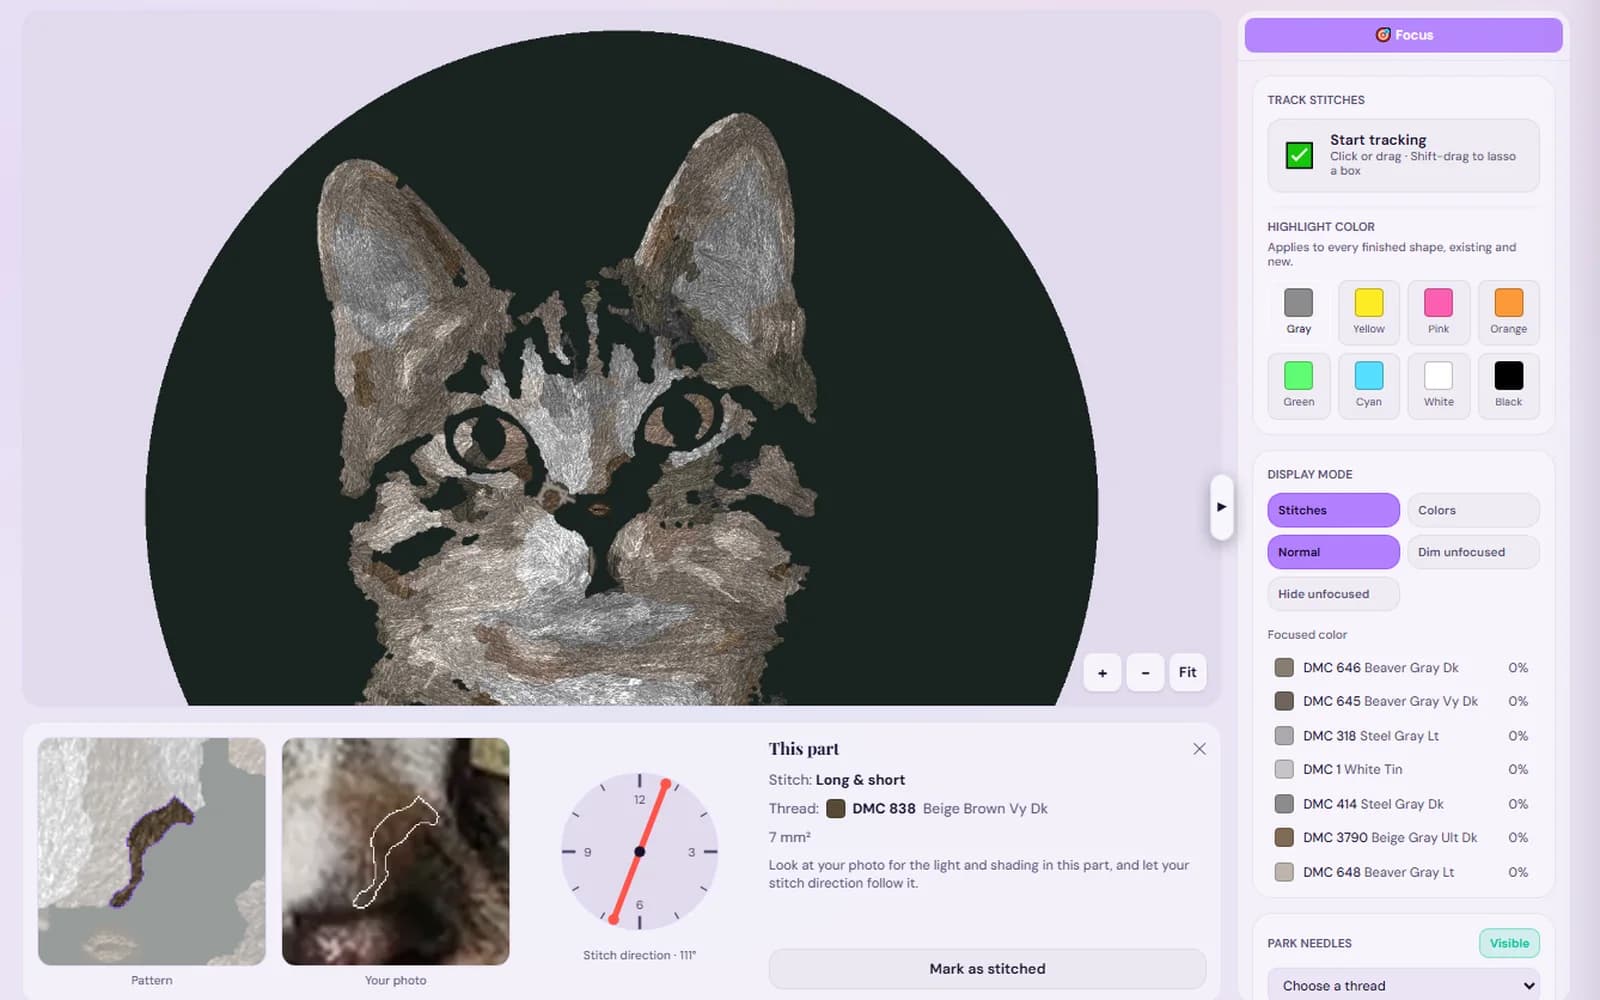
Mark shapes and color patches done as you go, park a needle per color, and see each part next to the same spot in your photo. Your progress is saved.
Wide areas get long and short stitch so colors blend like thread painting. Narrower fills get satin stitch, which stays smooth when stitches are short. Thin lines get stem stitch, small petal shapes get lazy daisy and dots become French knots.
Light catches thread along its length, so the angle of your stitches matters as much as the color. Every fill comes with a direction, shown as ticks in the PDF and on a clock-face wheel in the editor.
Every color is snapped to a shade you can buy. Switch between DMC, Anchor, Cosmo, Loops & Threads, Appletons crewel wool and Paternayan Persian wool, and every thread converts to that brand’s closest color.
The stitching order starts with the big fills, then smaller fills, raised stitches and knots, then line stitches and outlines last, so each layer sits cleanly over the one behind it.
Skein counts are worked out from the length of every stitch on the front, doubled and a bit for the thread that travels on the back, times the strands, plus 15% for waste and a quarter skein spare. Patterns use 2 strands of six-strand floss throughout (one strand for wool); see how many strands of floss if you want to vary that. The PDF is available in 26 languages.
Embroidery simplifies. A few inches of fabric can hold shapes and color, not every leaf in a hedge, so the best pictures have one clear subject, good contrast between it and the background, and not too much fine clutter. Crop tight before you upload.
Big petals and leaves map naturally to long and short, satin and lazy daisy. A single bloom or a small bunch works better than a whole garden bed.
A clear, well-lit face or full body against a plain background. Fur reads best in long and short stitch following the way it grows.
Choose an even, front-lit photo with a simple background. Faces are the most demanding subject, so expect to fine-tune a few shapes in the editor.
Bold lines and flat colors make some of the cleanest patterns, and a stitched copy is a keepsake that lasts.
Flat shapes with clear edges come out clean, and you can add backstitch outlines with one click.
Busy scenes, tiny text, dark or blurry photos and very low contrast give the generator less to work with. You can still edit the result, but a better starting picture saves time. For a deeper look at choosing and simplifying, read how to embroider a photo.
The first result is a starting point. In the free editor you can click any shape and choose from 21 stitches: fills like satin, long and short, fishbone, bullion knots, woven wheels and spider webs; line stitches like backstitch, stem, split, chain, running stitch and couching; and border stitches like blanket, herringbone, chevron, fern, feather, Cretan and cross stitch.
Turn a fill’s direction on the clock-face wheel, change the stitch size, recolor a shape or a single color patch, or add a color from the color wheel. Split a shape where you want a change (a smart split follows the edge in your photo) or merge two shapes into one. Add outlines, draw your own backstitch lines, and flip to the Stitches view to see real thread texture next to the original photo.
| Hand embroidery pattern (this tool) | Cross stitch pattern | Machine embroidery file | |
|---|---|---|---|
| What you get | Shapes with stitches, directions and a transfer | A grid of colored squares and symbols | A DST, PES or similar stitch file |
| How you stitch it | By hand, free-style, on any woven fabric | By hand, one X per square, on Aida or evenweave | An embroidery machine stitches it |
| Look | Textured, painterly, with sheen from the stitch direction | Pixel-like, even coverage | Dense, uniform machine fills |
| Putting it on fabric | Print and transfer the outlines | Count from the chart; no transfer | Load the file into the machine |
StitchThis makes hand embroidery and cross stitch patterns. It does not make machine embroidery files.
Prefer counted work? The cross stitch pattern maker turns photos into charts. For hand embroidery, you are in the right place: start your pattern and see your photo in stitches.
It is free to make and edit a pattern and preview it in stitches. Saving the pattern or downloading the PDF uses a pattern credit or a plan that includes embroidery.
From 2 to 7 inches across, in a circle, square or rectangle frame. That keeps the full-size transfer on one printed page. The PDF suggests fabric at least 4 inches bigger and a hoop 1 inch bigger than the design.
DMC by default, or Anchor, Cosmo, Loops & Threads, Appletons crewel wool and Paternayan Persian wool. Switching brand converts every thread to that brand’s closest color. To match a single shade, use the floss converter.
Yes, if you start small and simple. Every PDF shows how to work each stitch with a numbered diagram and gives the order to stitch in, and you can swap a tricky stitch for an easier one in the editor before you print.
No. StitchThis makes patterns for stitching by hand. If you have an embroidery machine you need digitizing software instead.
Yes, with our cross stitch pattern maker. It makes a counted chart with symbols and floss colors rather than a free-style embroidery design.
One clear subject with good contrast and a simple background: a flower, a pet, a portrait, a child’s drawing or a logo. Crop close before uploading; busy or blurry photos need more editing.
The pattern is ready in under a minute. Stitching time depends on the size, how much is filled and your pace; long and short fills take longest, outlines go quickly.
Making and editing a pattern is free with a StitchThis account. Saving it or downloading the PDF uses a pattern credit ($5.99 per pattern, or 5 for $20). Embroidery is included in Maker ($5.99/month) and in Craft Unlimited, with unlimited patterns.