How to Make a Cross-Stitch Pattern from a Wedding Photo (Step by Step)
Turn your wedding photo into a faithful, stitchable cross-stitch pattern. A step-by-step guide to cleaning the image, charting the faces, and stitching it in StitchThis.
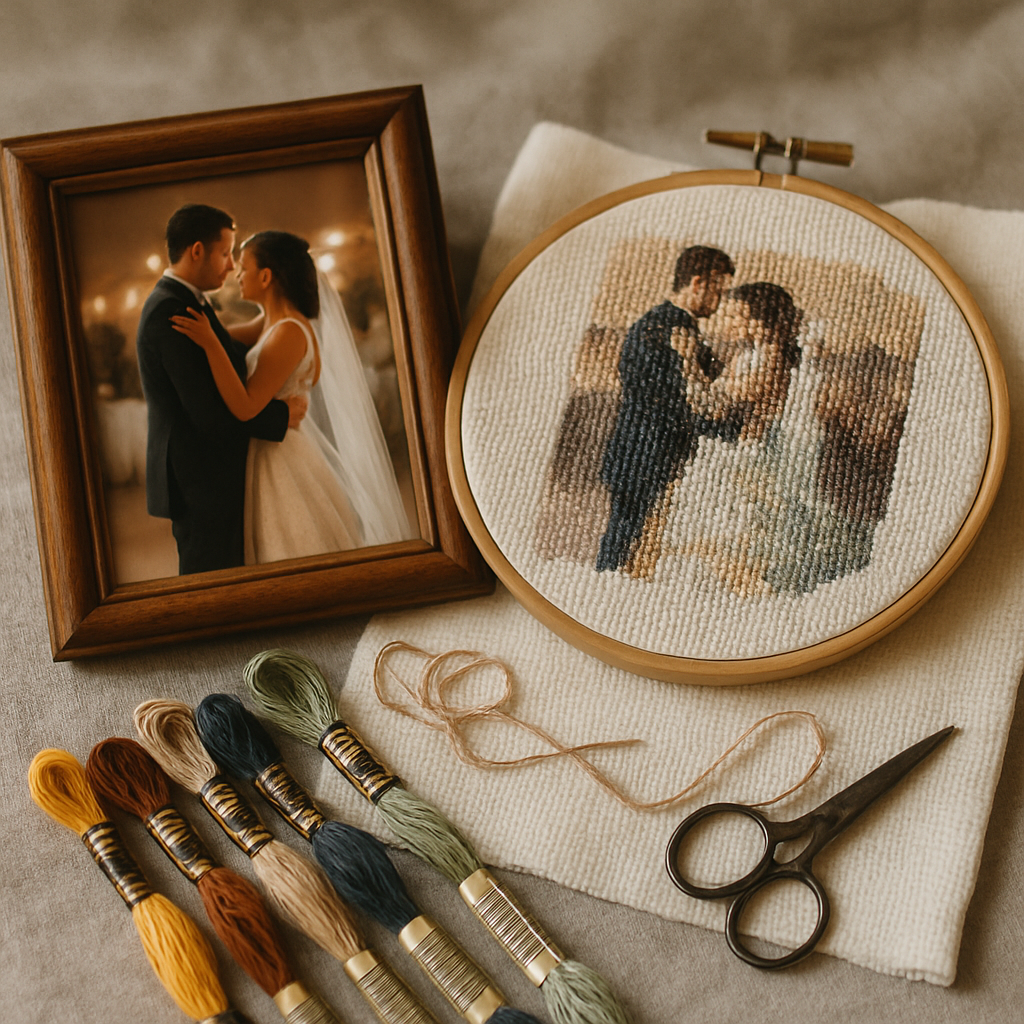
There's one photo from almost every wedding that deserves to be more than a file on a phone. The first look. The first dance. The two of you laughing at something nobody else heard. Framing the print is lovely, but stitching it — turning that single moment into thousands of deliberate stitches — is a different kind of keepsake. It says I sat with this memory for forty hours.
The catch is that wedding photos are genuinely one of the hardest things to turn into a good cross-stitch pattern. A white dress against a bright background gives a converter almost nothing to work with. Veils and lace explode into confetti. And the whole thing falls apart the moment the faces stop looking like your faces. Most free "photo to pattern" tools hand you a mess of single stitches in ninety colors and wish you luck.
This guide walks the whole arc — not just "upload and download," but how to get a wedding photo to a chart that's actually faithful and actually stitchable, and then how to sit down and stitch it without losing your place. We'll do it in StitchThis, because it's built for exactly this problem. You can try it free and follow along with your own photo.
Why wedding photos are uniquely hard to chart
 Before the steps, it helps to know what you're up against. These are the four things that wreck a naive conversion:
- The dress. A white gown against a light wall or sky is a near-total loss of contrast. Without help, the conversion can't tell where the dress ends and the background begins, so the silhouette goes soft.
- The lace and the veil. Fine, repeating detail is confetti bait — dozens of isolated single stitches that take forever and read as noise from a few feet away.
- The faces. This is the one that matters. A portrait can be technically accurate and still look like a stranger if the eyes, the mouth, and the shape of the face aren't preserved exactly.
- The background. Wedding venues are busy — string lights, guests, foliage, an aisle full of distraction. Every bit of that competes with you and your partner for the viewer's eye and for your floss budget.
A good wedding-photo pattern isn't about cramming in more detail. It's about putting the detail where it counts (your faces) and calming everything else down. That's the whole game, and it's exactly what the next steps do.
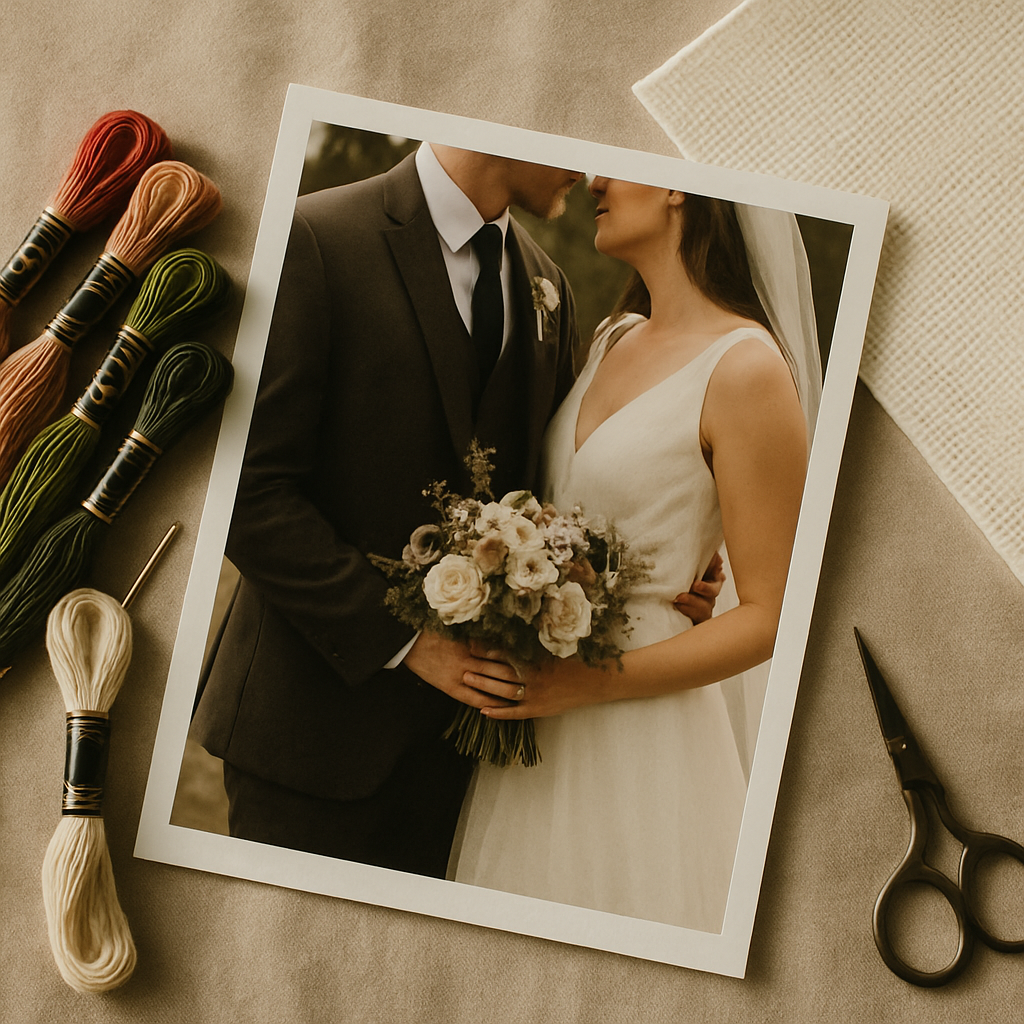
Step 1: Pick the right photo
 The pattern can only be as good as the source. Before you upload anything, choose with these in mind:
- Faces clear and reasonably large in frame. A wide shot where you're both tiny won't chart well at any size. Closer is better.
- Real contrast between subjects and background. A photo where you stand out from the setting beats a gorgeous but low-contrast one.
- Good, even light. Harsh shadow across a face is hard to chart faithfully.
- One strong focal point. A two-person portrait charts far more cleanly than a twelve-person group shot. (Group and family photos can work — that's its own approach, and we cover the multi-subject case separately.)
If you have a few candidates, you don't have to guess. On the Advanced plan you get unlimited generations, so you can chart two or three options and compare the previews side by side before you commit a single stitch. Many of the same framing principles from our pet-photography guide apply to people, too.
Step 2: Upload and let the image-to-pattern engine do the heavy lifting
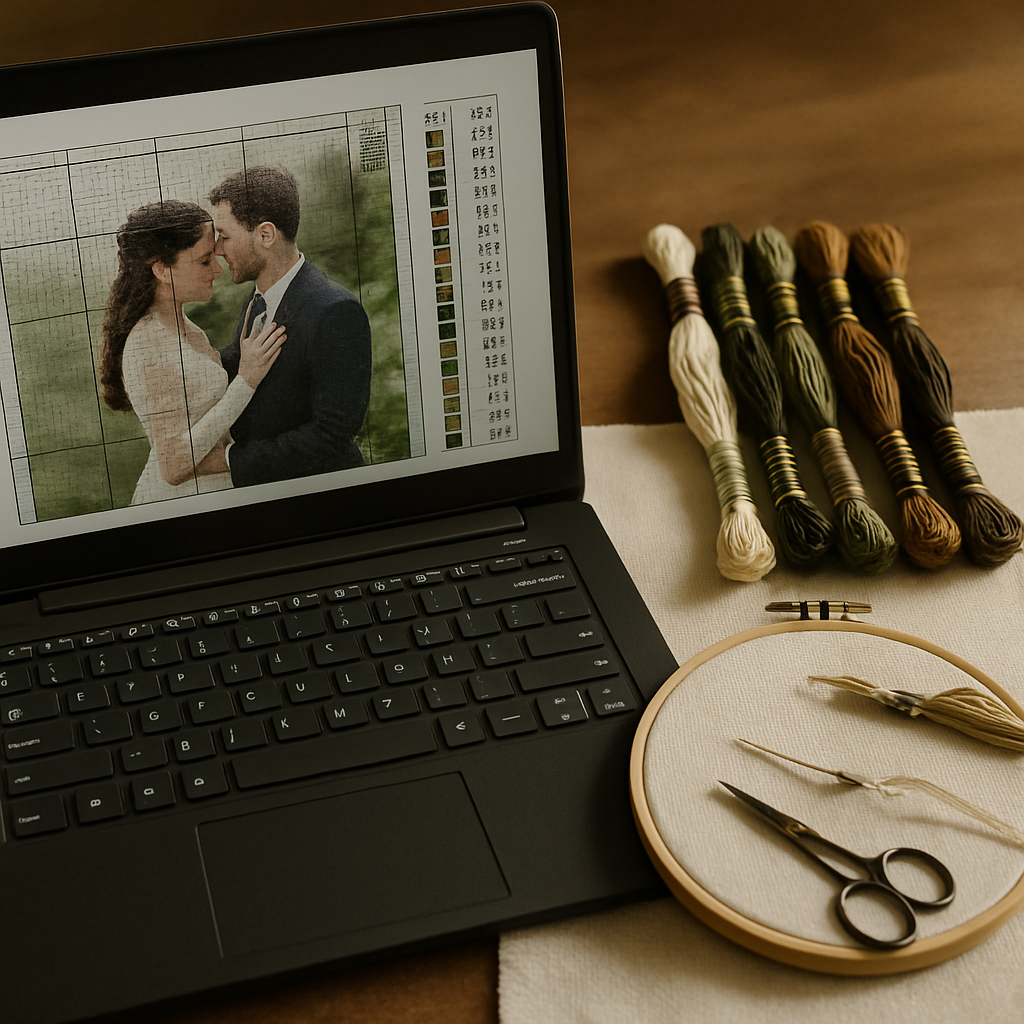 This is the core of StitchThis: the image-to-pattern engine takes your source photo and converts it into a real, counted cross-stitch chart — a grid of symbols mapped to specific floss colors, not a fuzzy picture. Upload the photo and you'll get a charted preview to work from.
Two things worth being completely clear about, because the cross-stitch community is — rightly — suspicious of AI fakery:
- The tools work on your source image, cleaning and preparing it.
- The pattern is charted faithfully from that image, stitch for stitch. You're getting a countable chart you can actually stitch and a printable PDF — never a fake "AI render" of a finished piece pretending to be a pattern.
That distinction is the whole reason serious stitchers trust the output.
Step 3: Clean up the source with the advanced image tools
Here's where wedding photos get rescued. Before you finalize the chart, StitchThis's advanced image tools let you fix the exact problems we listed above — all on the source image, before it's charted. Strip out a busy venue so it's just the two of you. Rescue the white dress against a bright background so the silhouette stays crisp. Smooth fussy lace and texture into stitchable shapes without flattening the faces. You can even combine two photos into one source — a favorite for anniversaries: the wedding-day photo beside a recent one, charted as a single "then and now" piece. (More ideas in our cross-stitch anniversary patterns guide.)
Spend your time here. Five minutes cleaning the source saves you from a chart you'll abandon halfway.
Step 4: Keep the faces faithful with StitchSense
Everything above simplifies the photo — which is good, except you never want to simplify the faces. That's what StitchSense is for. It preserves the detail in the focal point of the image, so when the background calms down and the lace smooths out, the eyes, expressions, and features that make the portrait yours stay sharp.
In practice, this is the difference between a finished piece your relatives recognize across the room and one where someone politely asks who it's of. Keep the cleanup aggressive everywhere else; let StitchSense hold the line on the faces.
Step 5: Match the palette to the floss you'll actually buy
A wedding piece doesn't need a hundred colors — it needs the right ones. StitchThis lets you chart against multi-brand palettes: DMC, Anchor, Cosmo, Gamma, Madeira, and Metro. Stitch in whatever brand you already own or can get locally, instead of converting color numbers by hand from a chart built for someone else's thread.
And before you place a thread order, check the floss stash tracker — it shows which colors in your palette you already have on hand, so you only shop for the gaps. Fewer skeins bought, less waste, faster start.
Step 6: Add your names and the date (optional, but worth it)
A portrait alone is beautiful. A portrait with your two names and your wedding date underneath becomes unmistakably a wedding keepsake. Use the freehand designer to chart custom lettering from scratch, or the pattern editor to add the names, "Est. [year]," or a small motif directly onto your charted design — adjusting individual stitches and colors until it's exactly right.
Why StitchThis owns the wedding-photo workflow: one place to convert the photo (image-to-pattern engine), rescue the dress and background (advanced image tools), keep the faces faithful (StitchSense), match your floss brand (multi-brand palettes), and add your names and date (freehand + editor) — then stitch the whole thing from the in-app viewer. That end-to-end flow is the point. Start free →
Step 7: Stitch it — and track every stitch — in the pattern viewer
This is the part most "photo to pattern" tools forget entirely: a chart isn't the finish line, the finished piece is. StitchThis includes a built-in pattern viewer so you can stitch directly from your screen and track your progress as you go — marking off completed stitches and always knowing exactly where you left off.
For a wedding portrait, which can run many hours across many evenings, that matters more than it sounds. No squinting at a printout to find your spot. No losing a row on a busy patch of dress. You open the viewer, see what's done, and pick up exactly where you stopped. It turns a big, intimidating project into a series of clear, finishable sessions.
Prefer paper? You can still export a clean PDF to stitch from at the frame — but for a long project, working from the viewer with live progress tracking is the calmer way to go. If you like working on a bigger screen, our pattern maker for Mac guide covers the desktop experience; it's the same toolset in any browser.
Sizing it so it actually gets finished
The two levers that decide whether a wedding portrait gets framed or stuffed in a drawer are stitch count and fabric count.
- Stitch count sets the detail and the hours. More stitches mean a finer portrait and a longer project. For a first photo project, resist the urge to max it out.
- Fabric count sets the finished size. Higher counts (16, 18) pack the same stitches into a smaller, finer piece; 14 stitches up faster and easier on the eyes. Our Aida 14 vs 16 vs 18 guide walks through the trade-off, and our stitch count to inches calculator turns any stitch count into a finished size.
When in doubt for a gift with a deadline, go a little smaller. A finished 8×10 beats an unfinished masterpiece every time.
Frequently asked questions
Can you turn any wedding photo into a cross-stitch pattern? Most photos work, but the result tracks the source. Clear faces, decent contrast, and a strong focal point chart best. Busy group shots and very low-contrast images need more cleanup — which is exactly what the advanced image tools are for.
How do I keep the faces from looking wrong? Simplify the background and the dress, not the faces. StitchSense preserves the detail in the focal point so the features that make it look like you stay sharp while everything else calms down.
Will the white dress disappear into the background? Not if you boost contrast and, where it helps, remove the background first. Both are built-in image tools you apply to the source before charting.
How many colors will a wedding portrait need? Fewer than you'd expect once the background is removed and the image is cleaned up. You choose the palette and the brand — and check the stash tracker so you only buy what you don't already own.
Can I stitch it on my phone or computer instead of printing it? Yes. The built-in pattern viewer lets you stitch from the screen and track completed stitches, so you always know where you left off. You can also export a clean PDF if you prefer paper.
Is this an "AI pattern"? No. Advanced tools help you clean and prepare your source image; the pattern itself is a real, counted chart made faithfully from that image. You stitch genuine, countable stitches — there's no fake "finished" render involved.
Turn the photo into the keepsake
The print will sit in a frame. The stitched version will carry the hours you spent making it — and that's what makes it the heirloom. With StitchThis you can do the whole thing in one place: convert the photo, rescue the dress and background, keep the faces faithful, match your floss, add your names and date, and stitch it from a viewer that tracks every stitch.
Try StitchThis free and start your wedding-photo pattern today — then make the matching wedding bouquet pattern from the same day. If you design for others, StitchThis Studio adds batch generation and seller tools for offering custom wedding portraits as commissions.
Related reading on StitchThis:
Ready to turn your photo into a cross-stitch pattern?
Try StitchThis freeTwo patterns per month. No card required.